
Keycloak
An attempt to document the setup
This is the second time I'm using Keycloak, so I'm no expert...
Keycloak appears to be a powerful solution that seems to fulfill all my requirements. Therefore, I integrated it into my custom homemade Node.js framework.
The features I'm interested in are:
- Simple container
- Postgres as the user database
- Extensive documentation
- Support for a variety of providers
- Tested Github and Discord
- Support for username and email with password
- Support for linked accounts (e.g., GitHub and/or user/password)
- UI for managing everything, albeit a bit challenging
- Support for OAuth Flows
- Highly configurable
- Users, Groups, Roles, and clients
- Authentication and Authorization in one tool
- And much more
It covers everything I believe is necessary for an authentication and authorization system.
Setup
docker-compose.yml
Ensure you're using the latest version available as the repository seems active.
version: '3.8'
services:
  postgres:
    container_name: keycloak-psqldb
    restart: unless-stopped
    image: postgres:16-alpine
    ports:
      - 5432:5432 # Local access using port 5442
    environment:
      - POSTGRES_PASSWORD=keycloak-db-password
      - PGDATA=/var/lib/postgresql/data/pgdata
      - POSTGRES_DB=keycloak
    volumes:
      - keycloak-psqldb:/var/lib/postgresql/data
    healthcheck:
      test: ['CMD-SHELL', 'pg_isready']
      interval: 10s
      timeout: 5s
      retries: 5

  keycloak:
    depends_on:
      postgres:
        condition: service_healthy
    container_name: keycloak
    restart: unless-stopped
    image: quay.io/keycloak/keycloak:23.0
    ports:
      - 8443:8443
    volumes:
      - $HOME/keycloak/conf/:/conf/:ro
      - $HOME/keycloak/providers:/opt/keycloak/providers/
    environment:
      - KEYCLOAK_ADMIN=admin
      - KEYCLOAK_ADMIN_PASSWORD=change_me
      - KC_METRICS_ENABLED=true
      - KC_HEALTH_ENABLED=true
    command:
      - --verbose
      - start
      - --db=postgres
      - --hostname=localhost
      - --db-url=jdbc:postgresql://postgres:5432/keycloak
      - --db-username=postgres
      - --db-password=keycloak-db-password
      - --https-key-store-file=/conf/server.keystore
      - --https-key-store-password=change-this-password

volumes:
  keycloak-psqldb:
mkdir -p ./keycloak/conf/

keytool -genkeypair -storepass change-this-password -storetype PKCS12 -keyalg RSA -keysize 2048 -dname "CN=server" -alias server -ext "SAN:c=DNS:localhost,IP:127.0.0.1" -keystore ./keycloak/conf/server.keystore

docker compose up -d
Once started, you can access the Postgres database on port 5432 and the Keycloak admin UI at https://localhost:8443.
The Realm
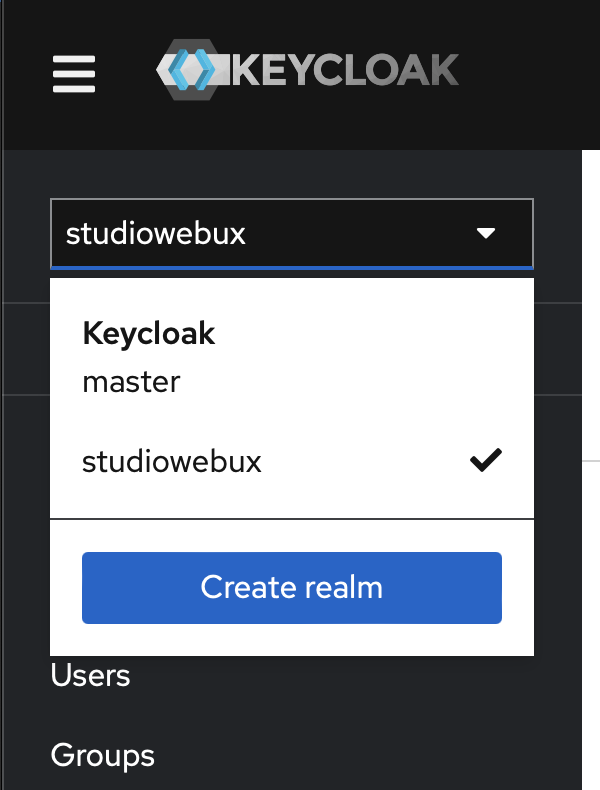
For this, I will use the name studiowebux.
Simply click Create realm, enter the desired name. I recommend avoiding uppercase, dashes, underscores, etc., unless you're familiar with these special characters, as they might lead to mistakes when configuring external tools.
The First Client
A client is used to configure access. You can create multiple clients within a realm to configure access for different applications.
Here, I'll focus on the Node.js part.
- Click Clients.
- Create Client.
- Select OpenID Connect.
- Enter the Client ID (for this demo, I'm using
nodejs). - You can fill the rest of the options if needed.
- Click Next.
- Enable Client Authentication.
- Enable Authorization.
- Click Next.
- Configure as follows for the demo application:
- Root URL:
http://localhost:3000 - Home URL:
http://localhost:3000 - Valid Redirect URIs:
http://localhost:3000/auth/callback - Valid Post Logout Redirect URIs:
http://localhost:3000/auth/logout/callback - Web Origins:
http://localhost:3000
- Root URL:
Open the client from the list to perform additional configurations. The setup that follows worked for my needs, but there might be better ways to do this.
The first adjustment I made is:
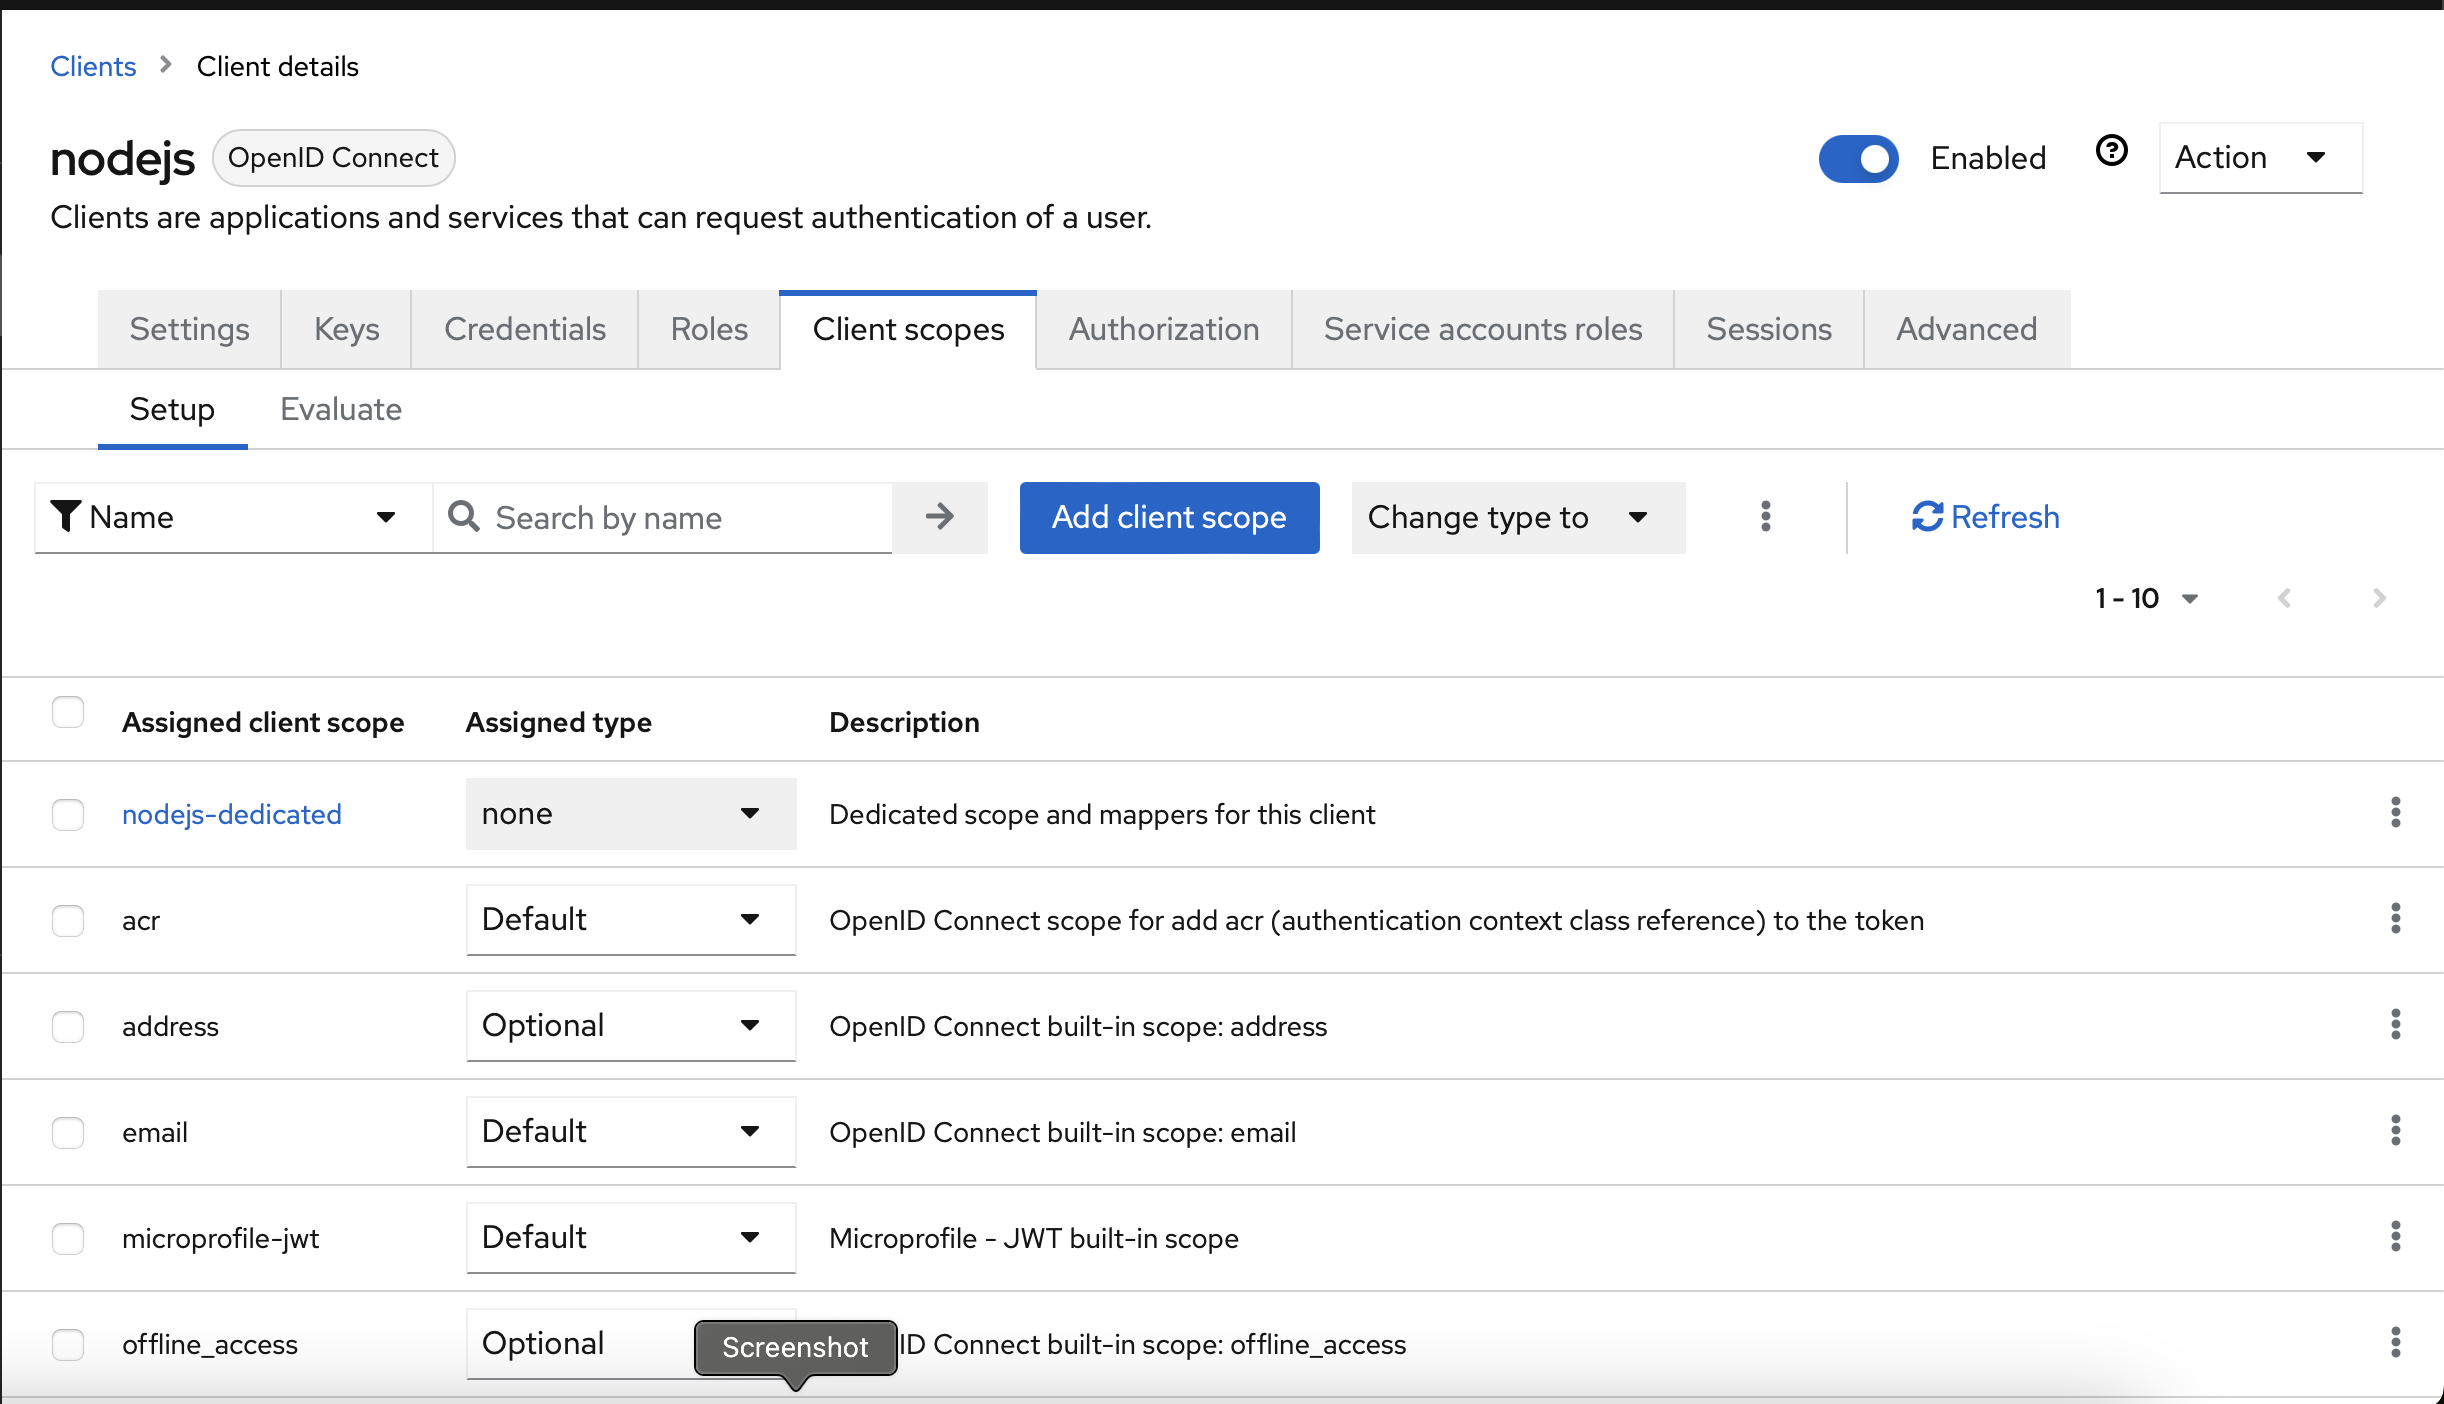
Click the Client Scopes tab, set microprofile-jwt to Default. This includes the groups array in the ID Token, allowing for Group-based permissions in the Node.js code.
Groups and Realm Roles
We need to navigate through different tabs in the left menu.
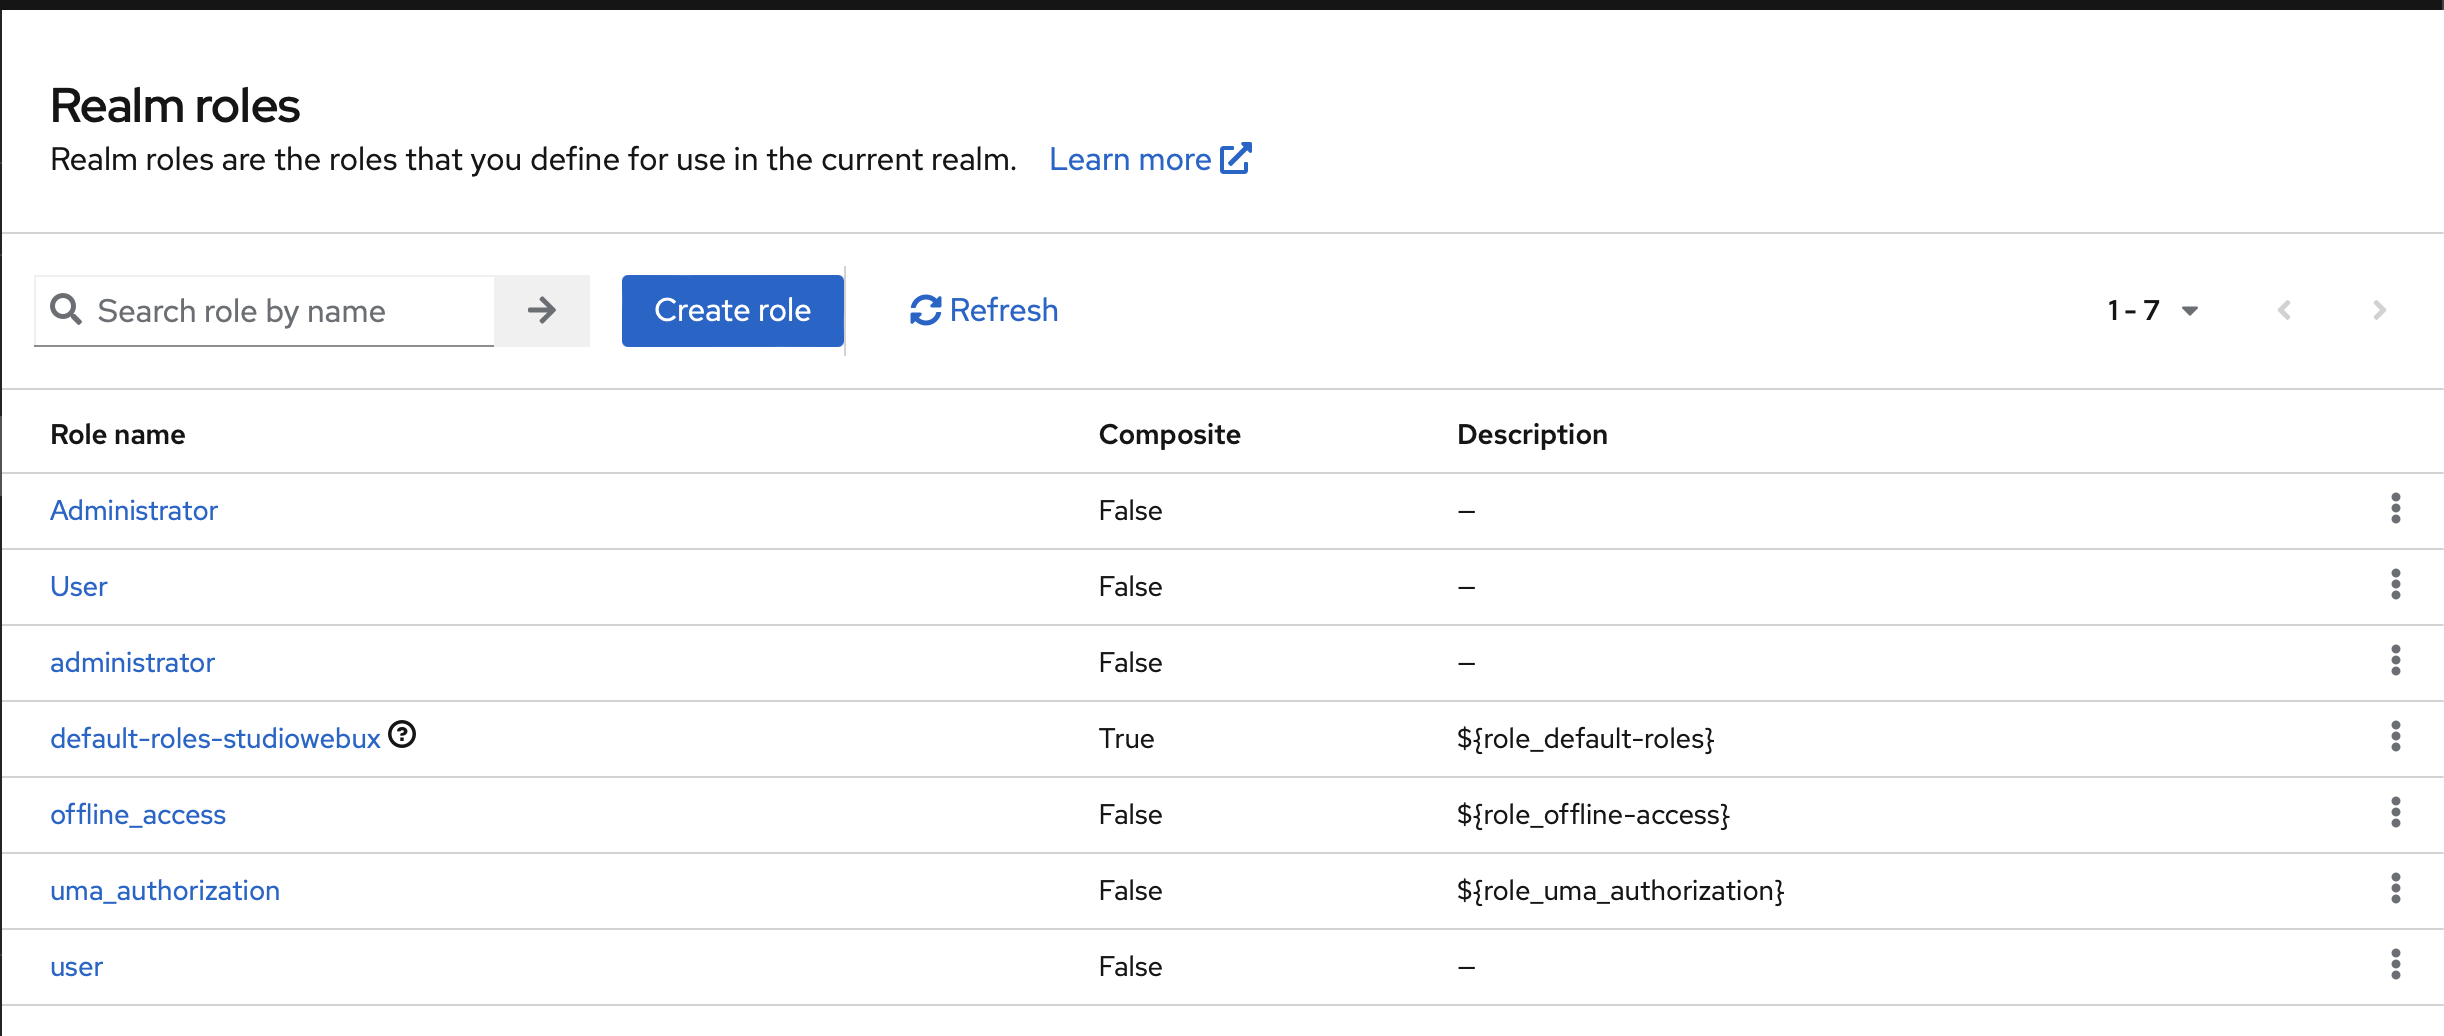
First step: Link groups to roles. I use the Realm role to apply these to the entire realm (you can also apply these per client).
Go to the Realm Roles tab:
Create the two roles as before.
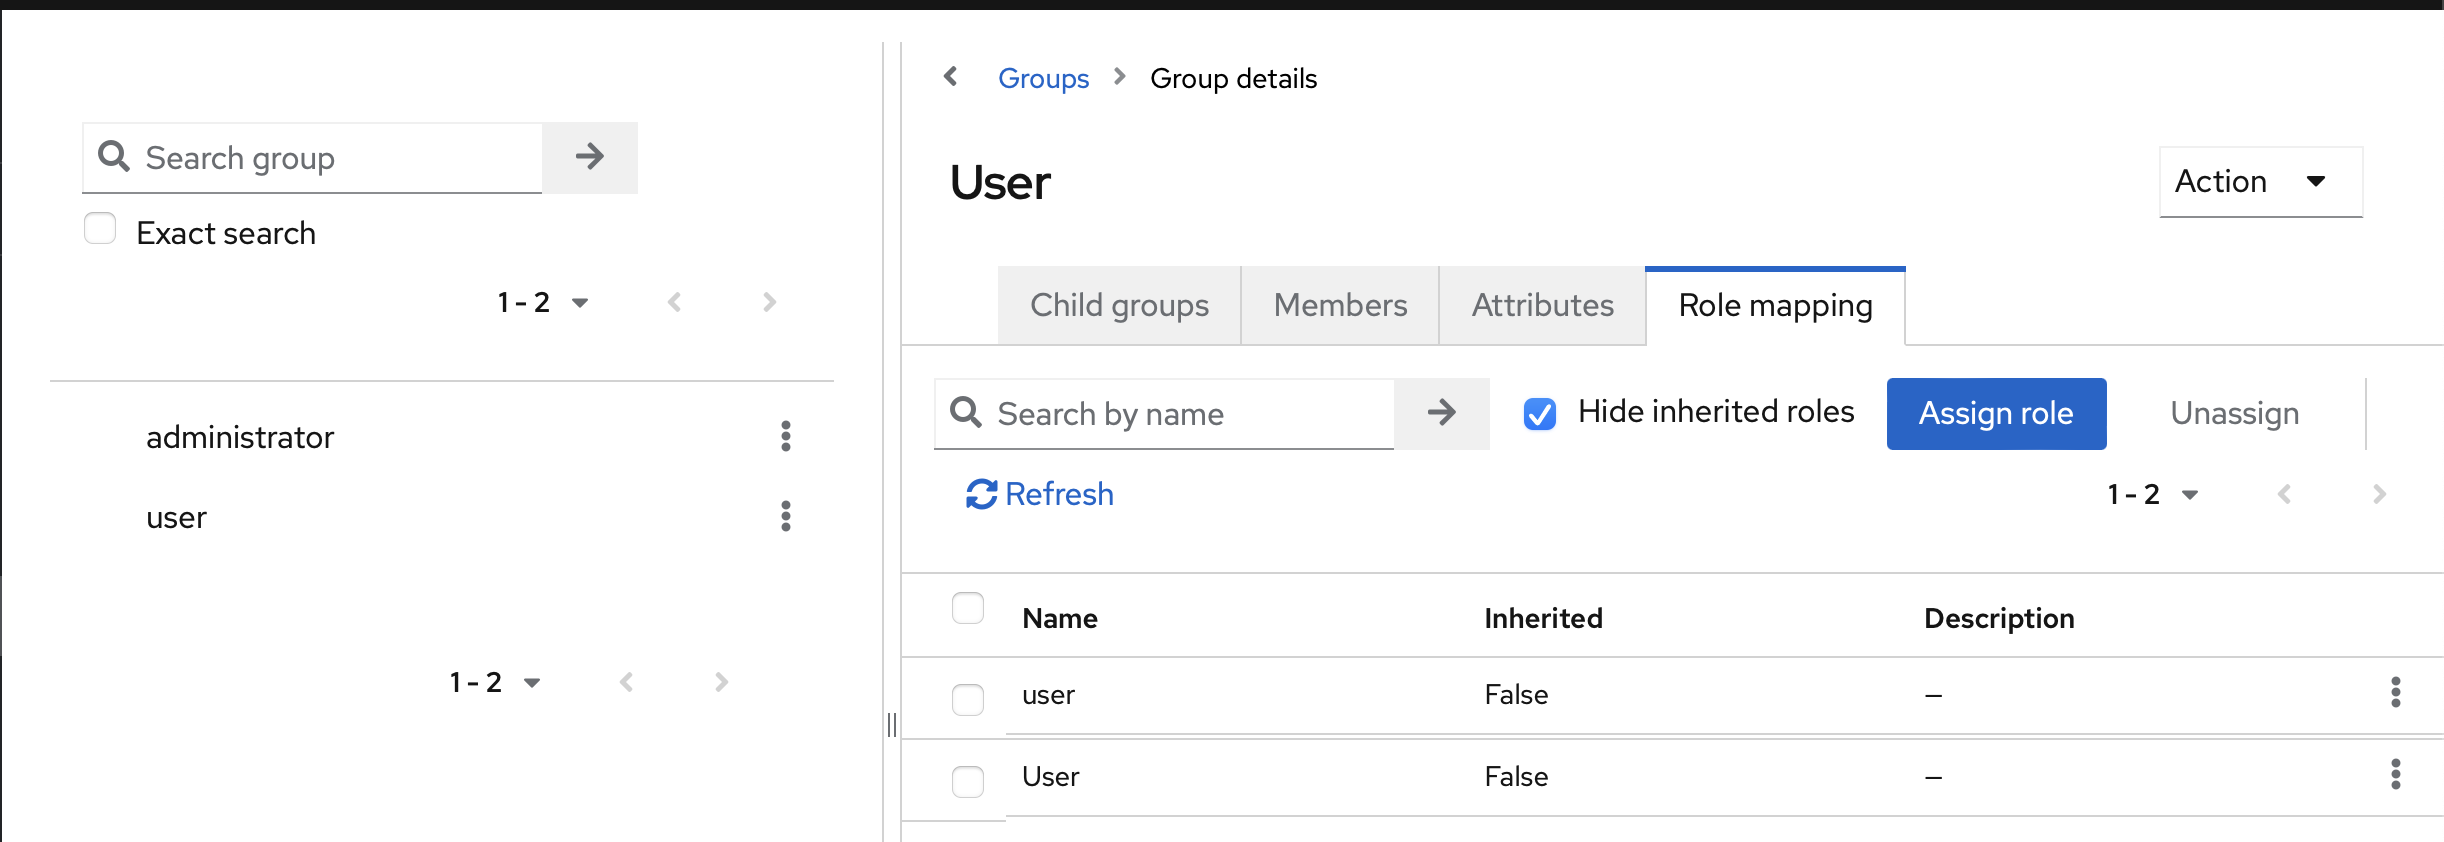
Second step:_ Create two groups, administrator and user.
Go to the Groups tab:
I did not use the hierarchy group feature, so I'm not sure if it's better to do so.

Now, link the roles and groups together. Open the group by clicking its name, then go to Role mapping and click assign role. Do this for all your roles/groups.
Again, stick with the lowercase version.
That's the basic setup covered!
Authorizations
Here, I'll cover three things:
- Role/Group-based permissions
- Scope-based permissions
- Path-based permissions
There are many other possibilities I haven't explored yet.
Navigate back to our client (Node.js), then click on the Authorization tab.
If there's anything in the Resources, Scopes, Policies, and Permissions, you can safely delete everything.
For this, I'll configure it like the demo App I used to learn all of this. The demo is available on GitHub: Node.js Demo
The README in this repo covers Discord and GitHub integrations as well.
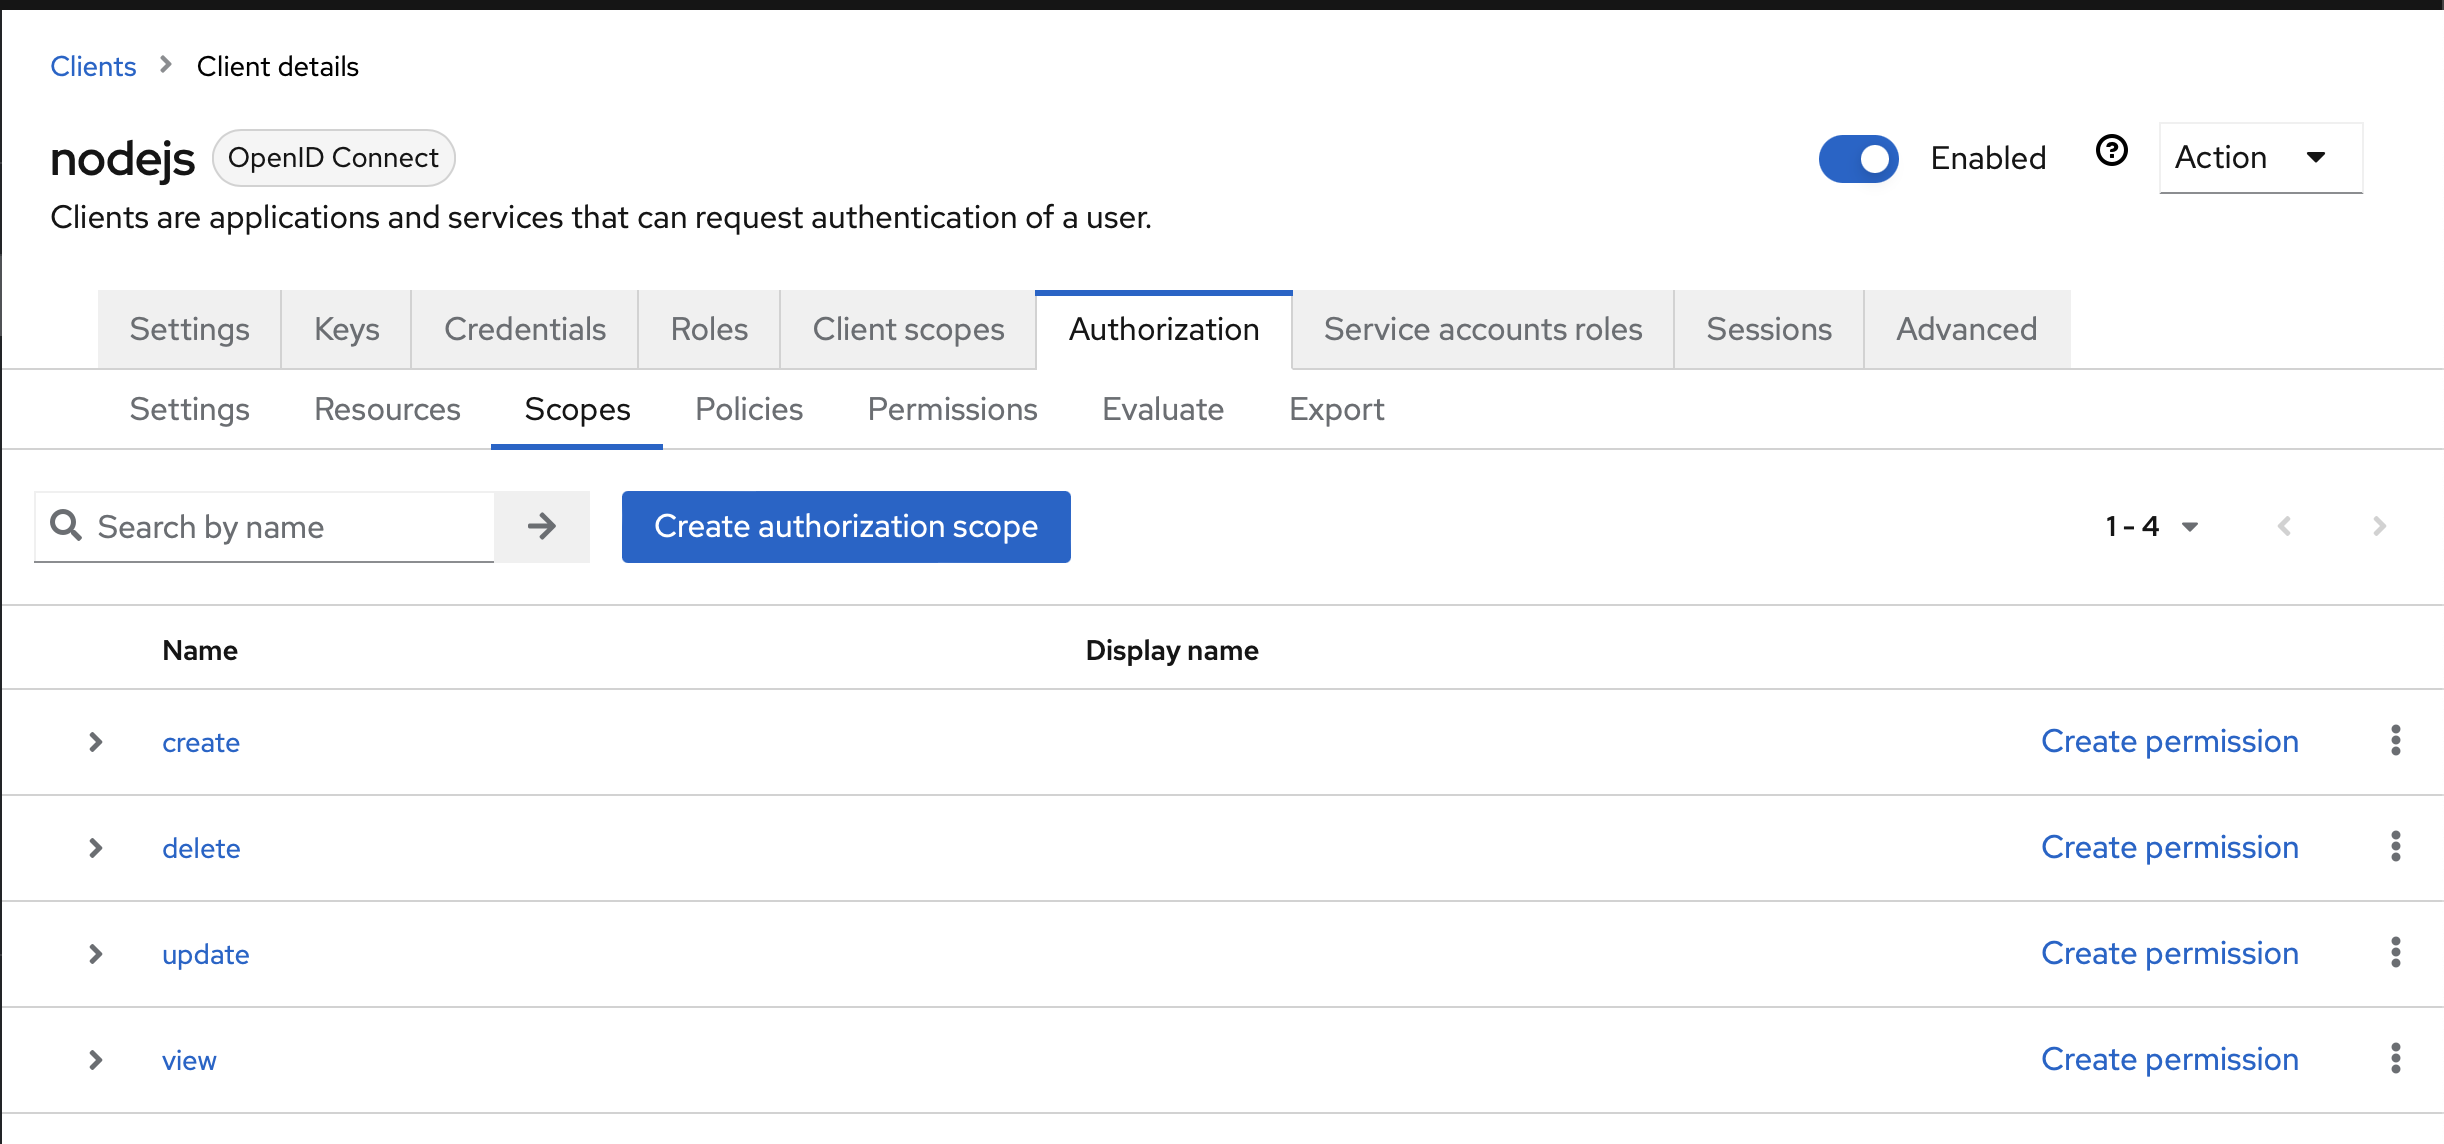
Scopes
Create scopes like these:
- create
- delete
- update
- view
These are used to define who can do what.
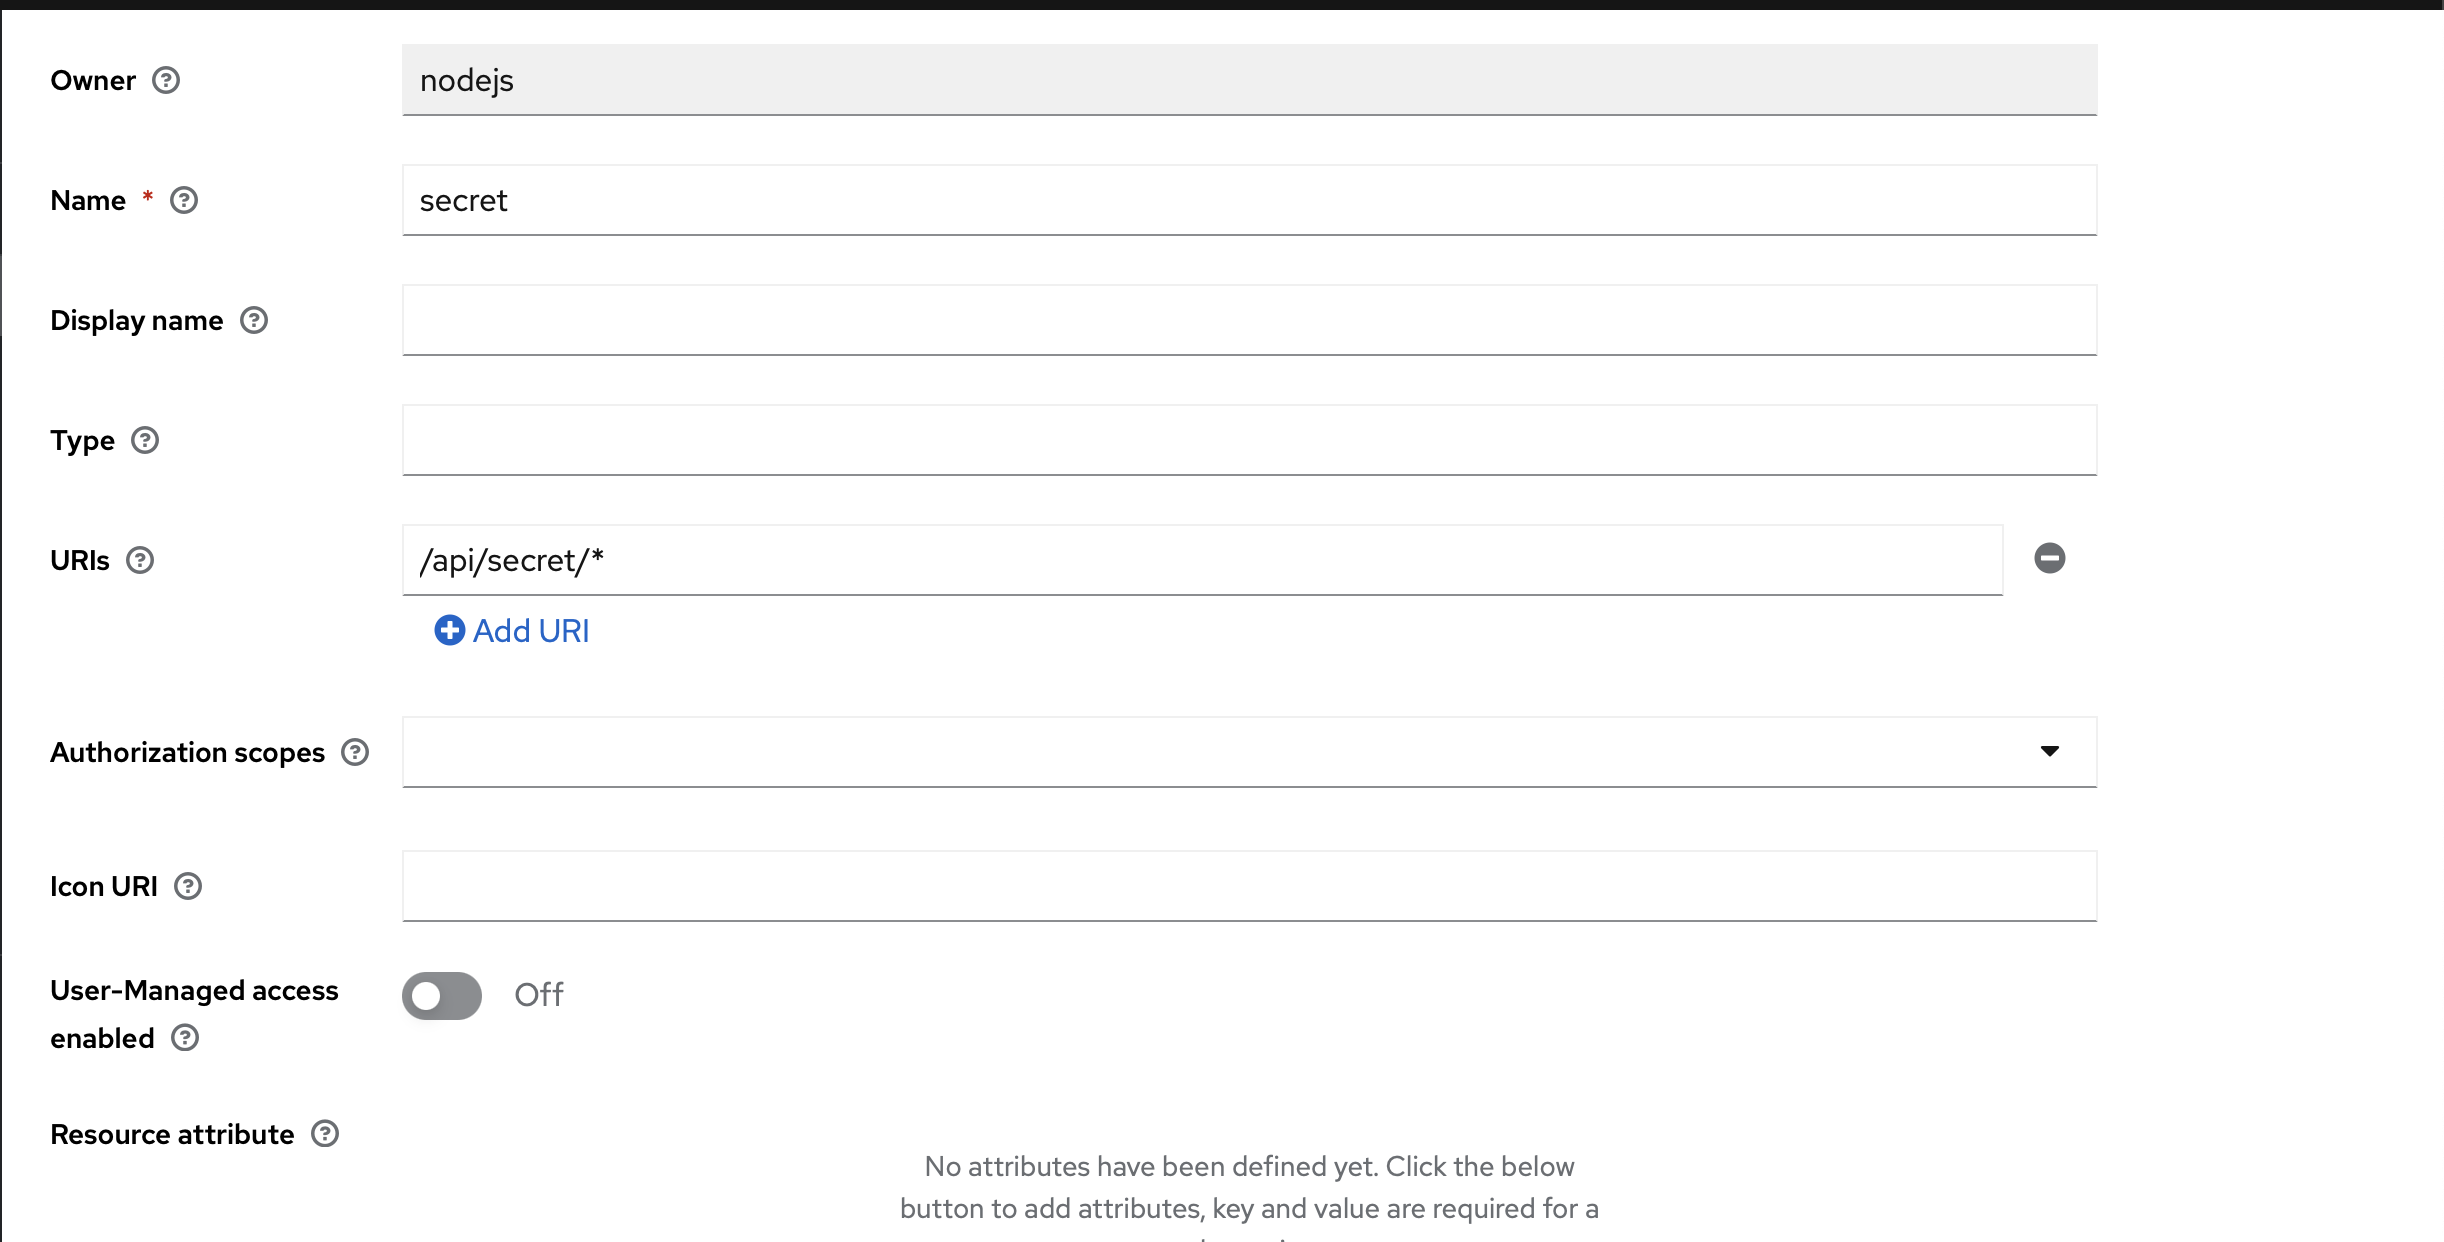
Resources
- Click create resource.
- Fill in the information
as shown in the screenshot.
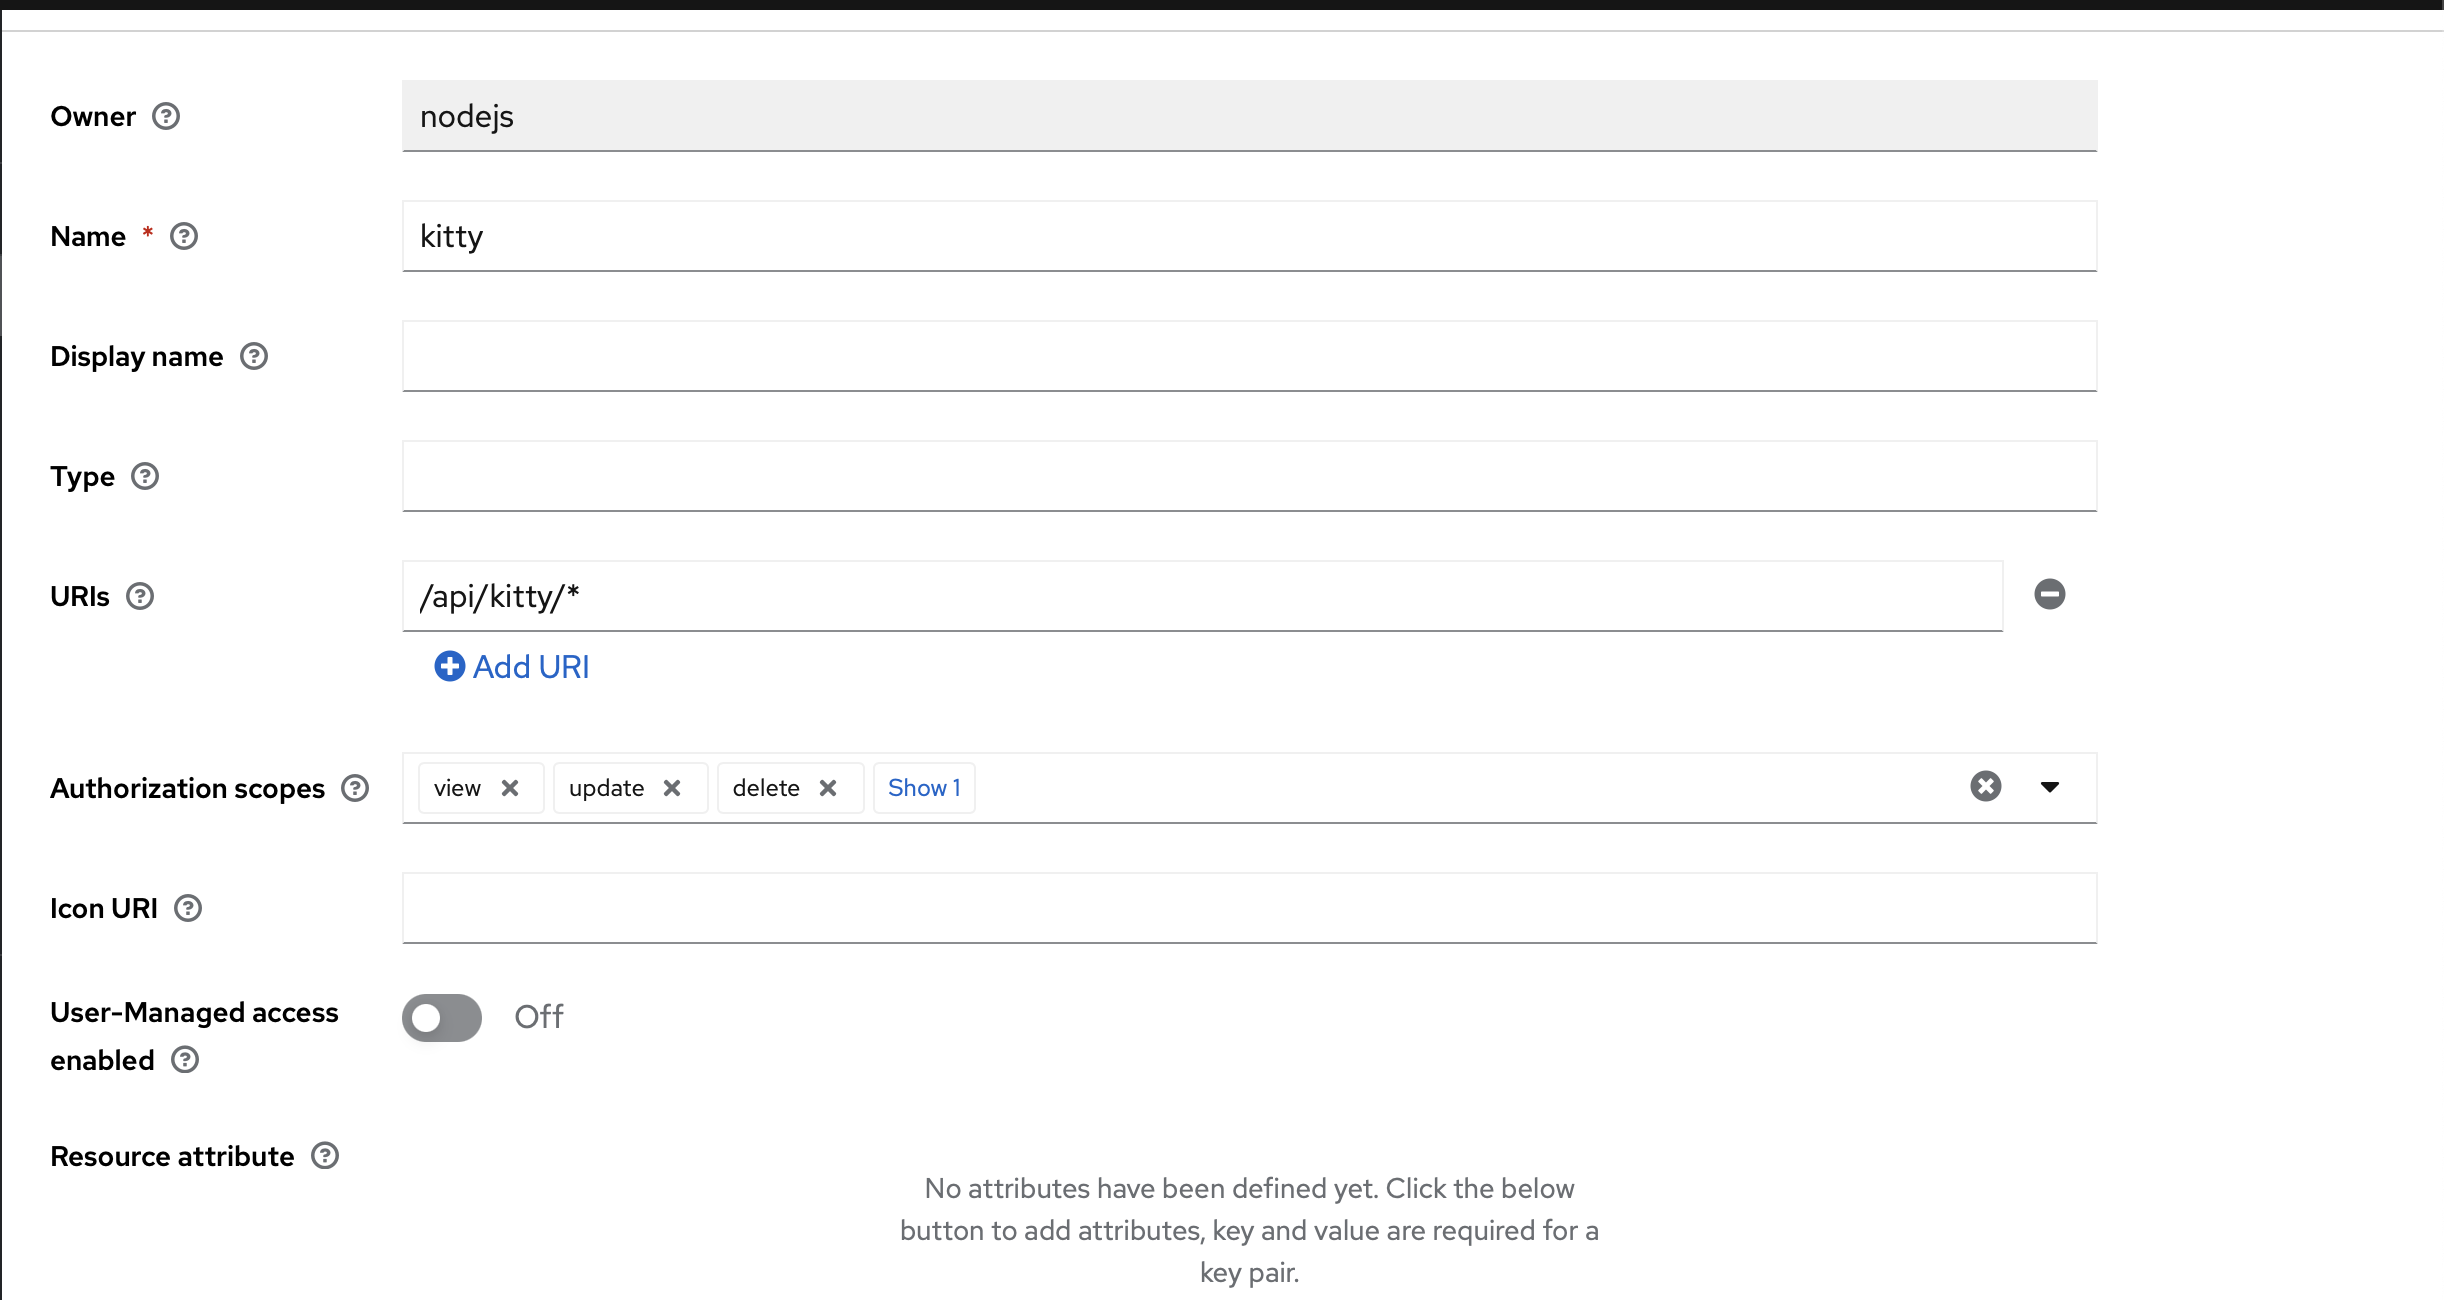
For the Kitty resource, select all scopes and use this URL: /api/kitty/*.
For the Secret resource, enter only this URL: /api/secret/*.
Policies
This is where you define the authorization for your resource.
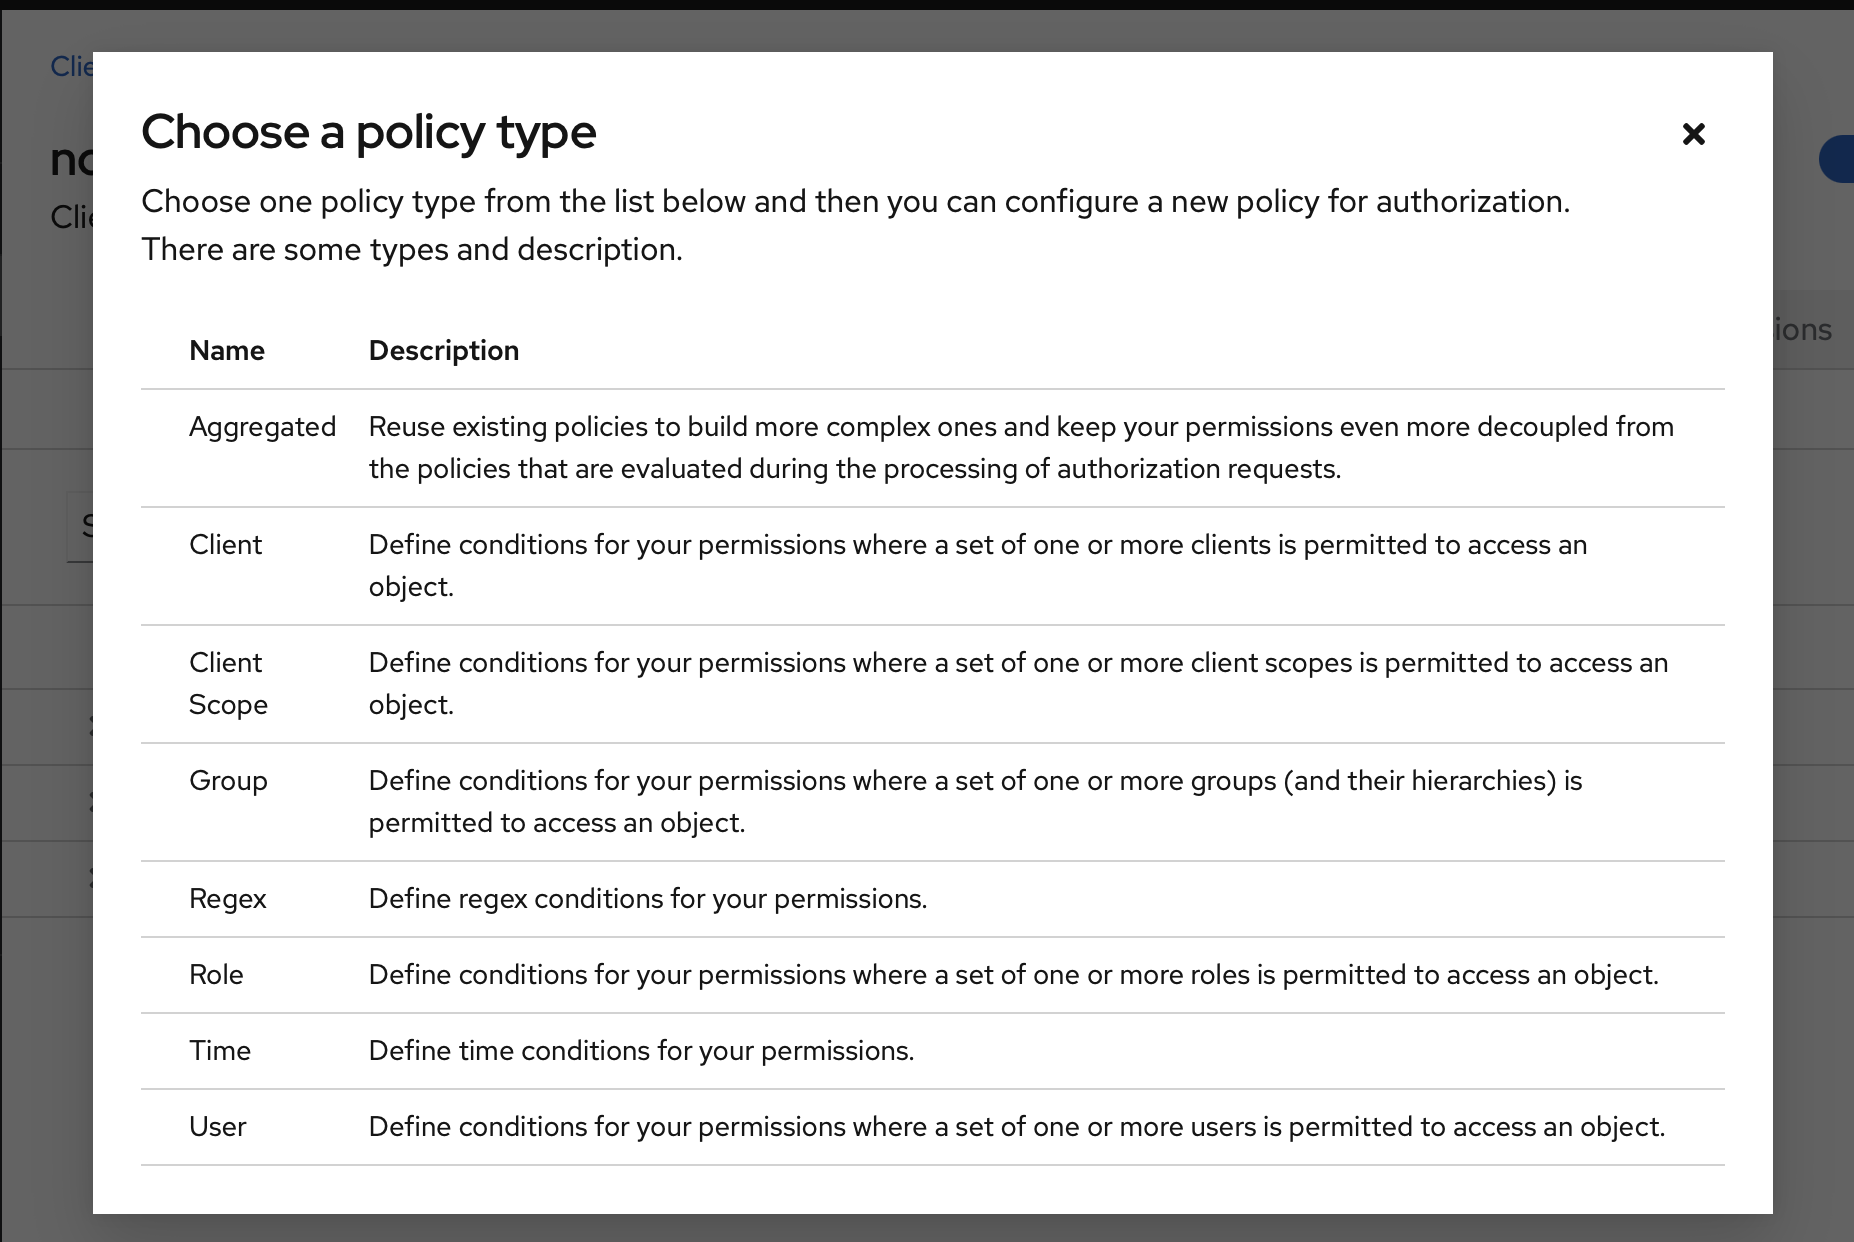
Let's start with the secret page: Create a Group policy and fill it like the following screenshot:
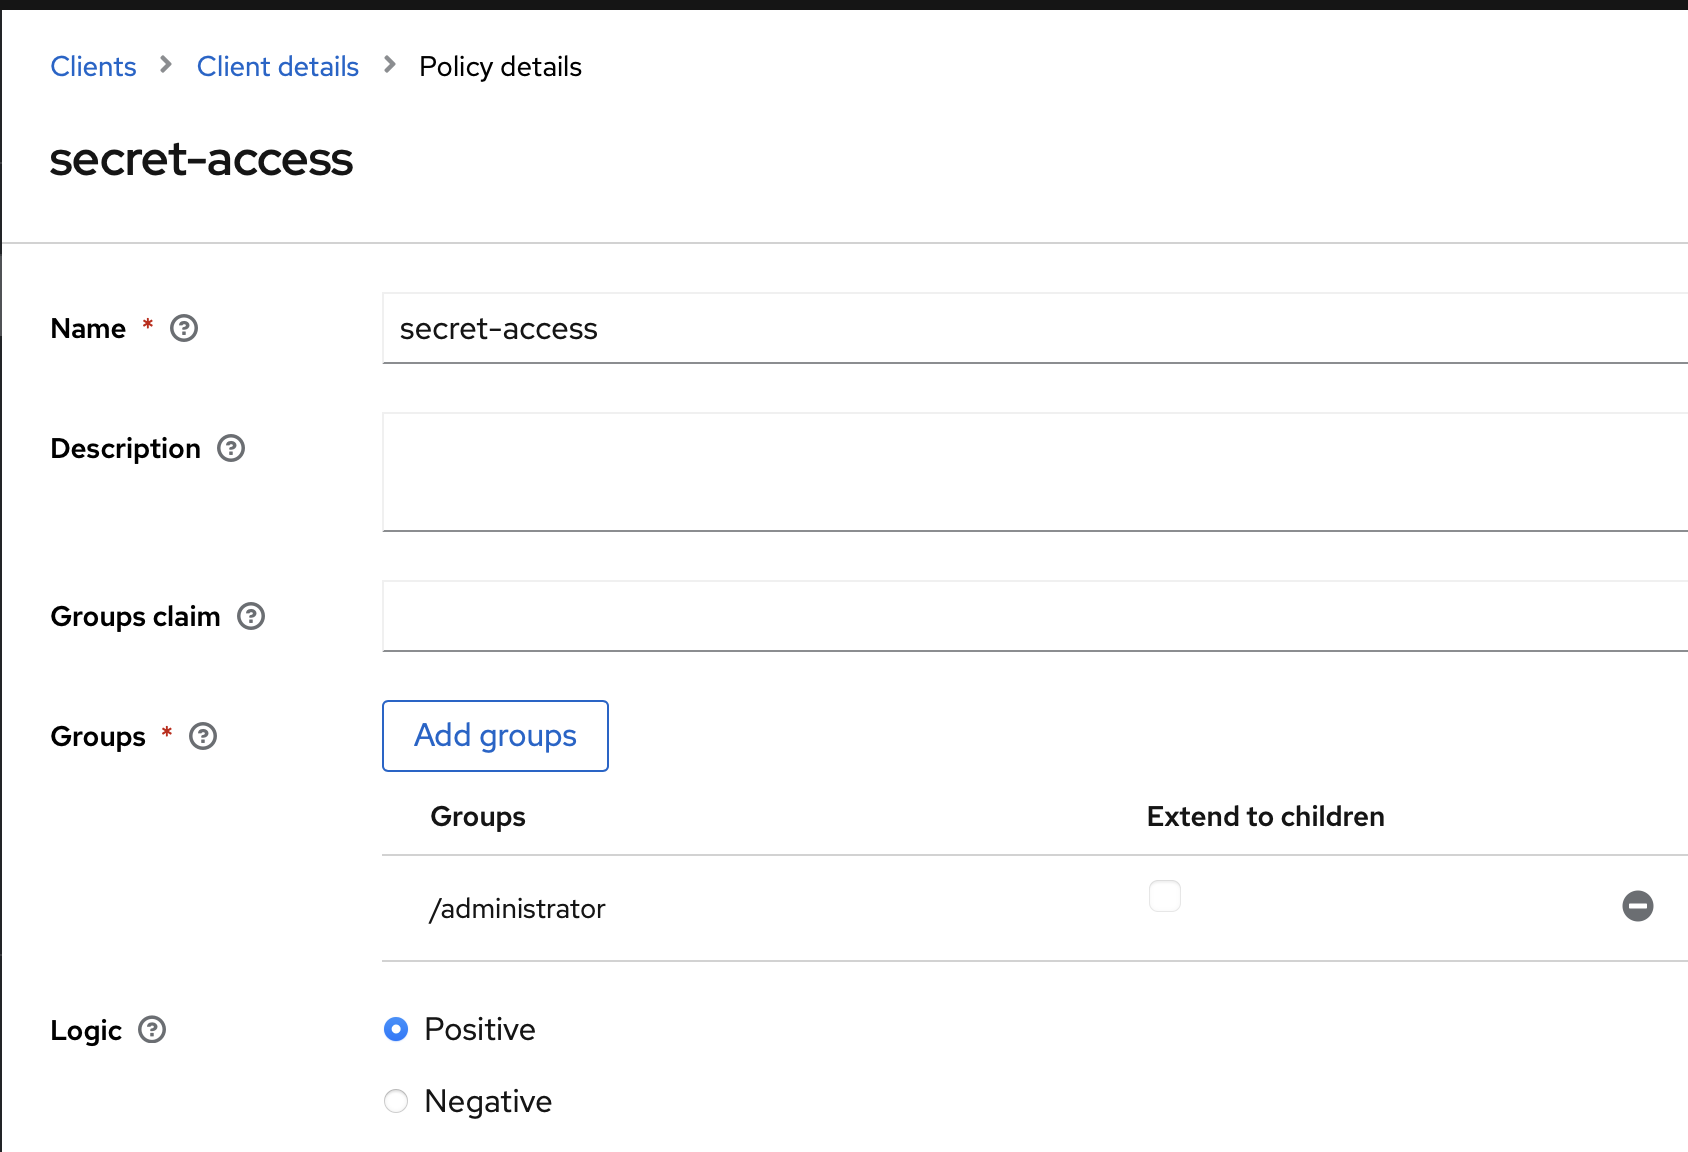
This policy will allow anyone in the administrator group to access all the secret routes.
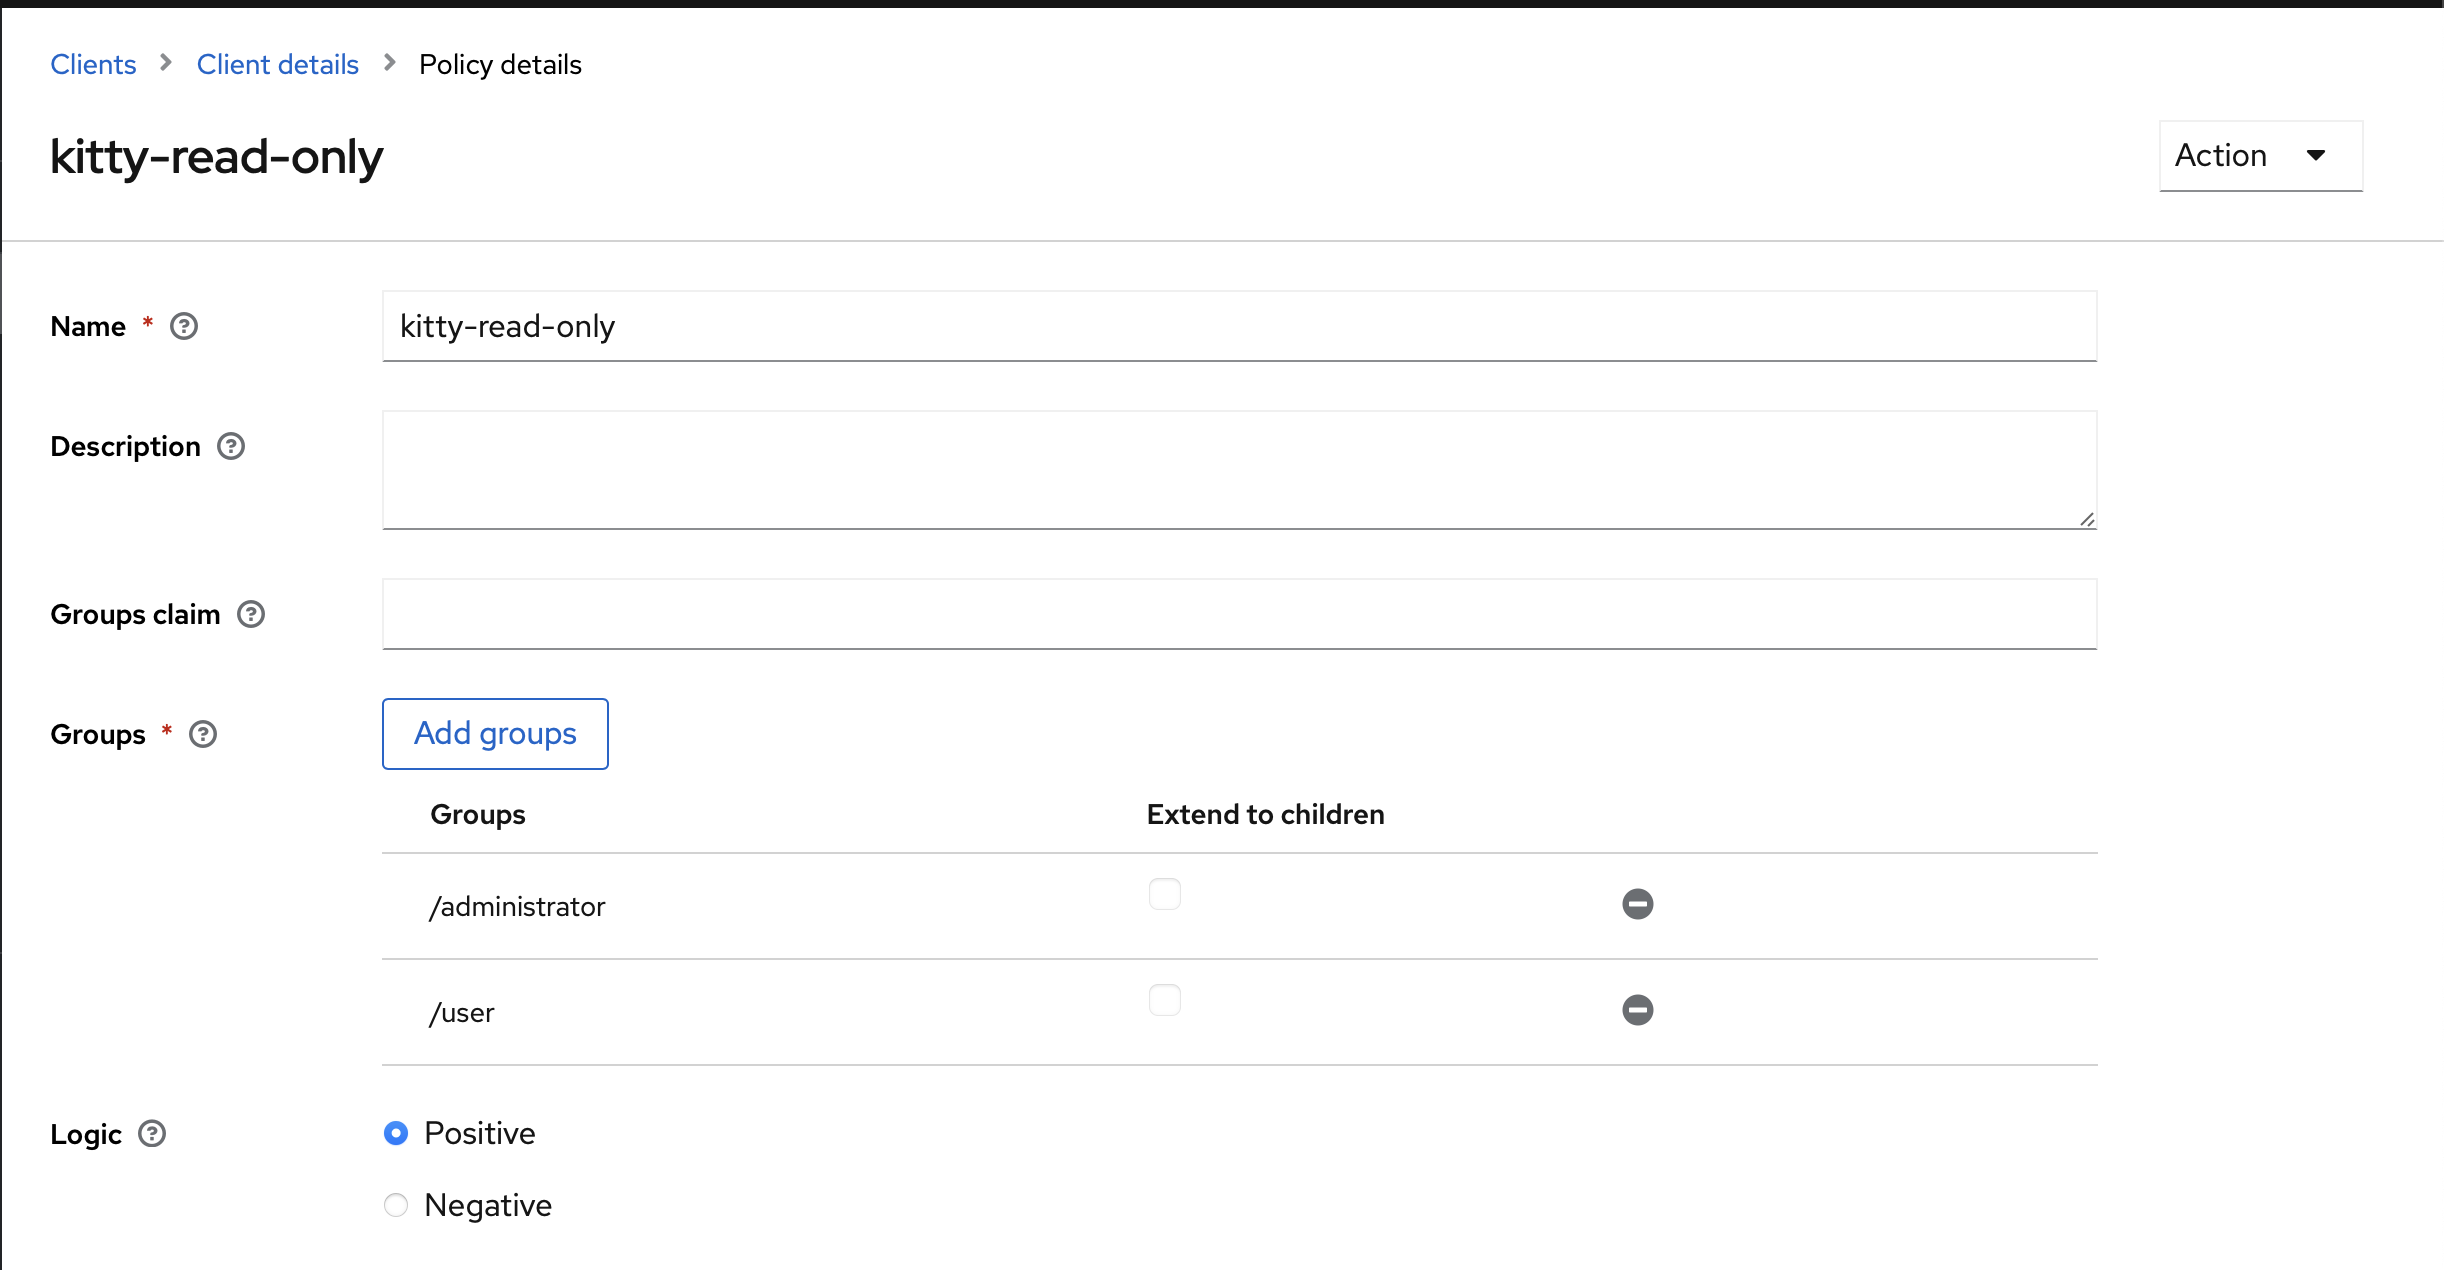
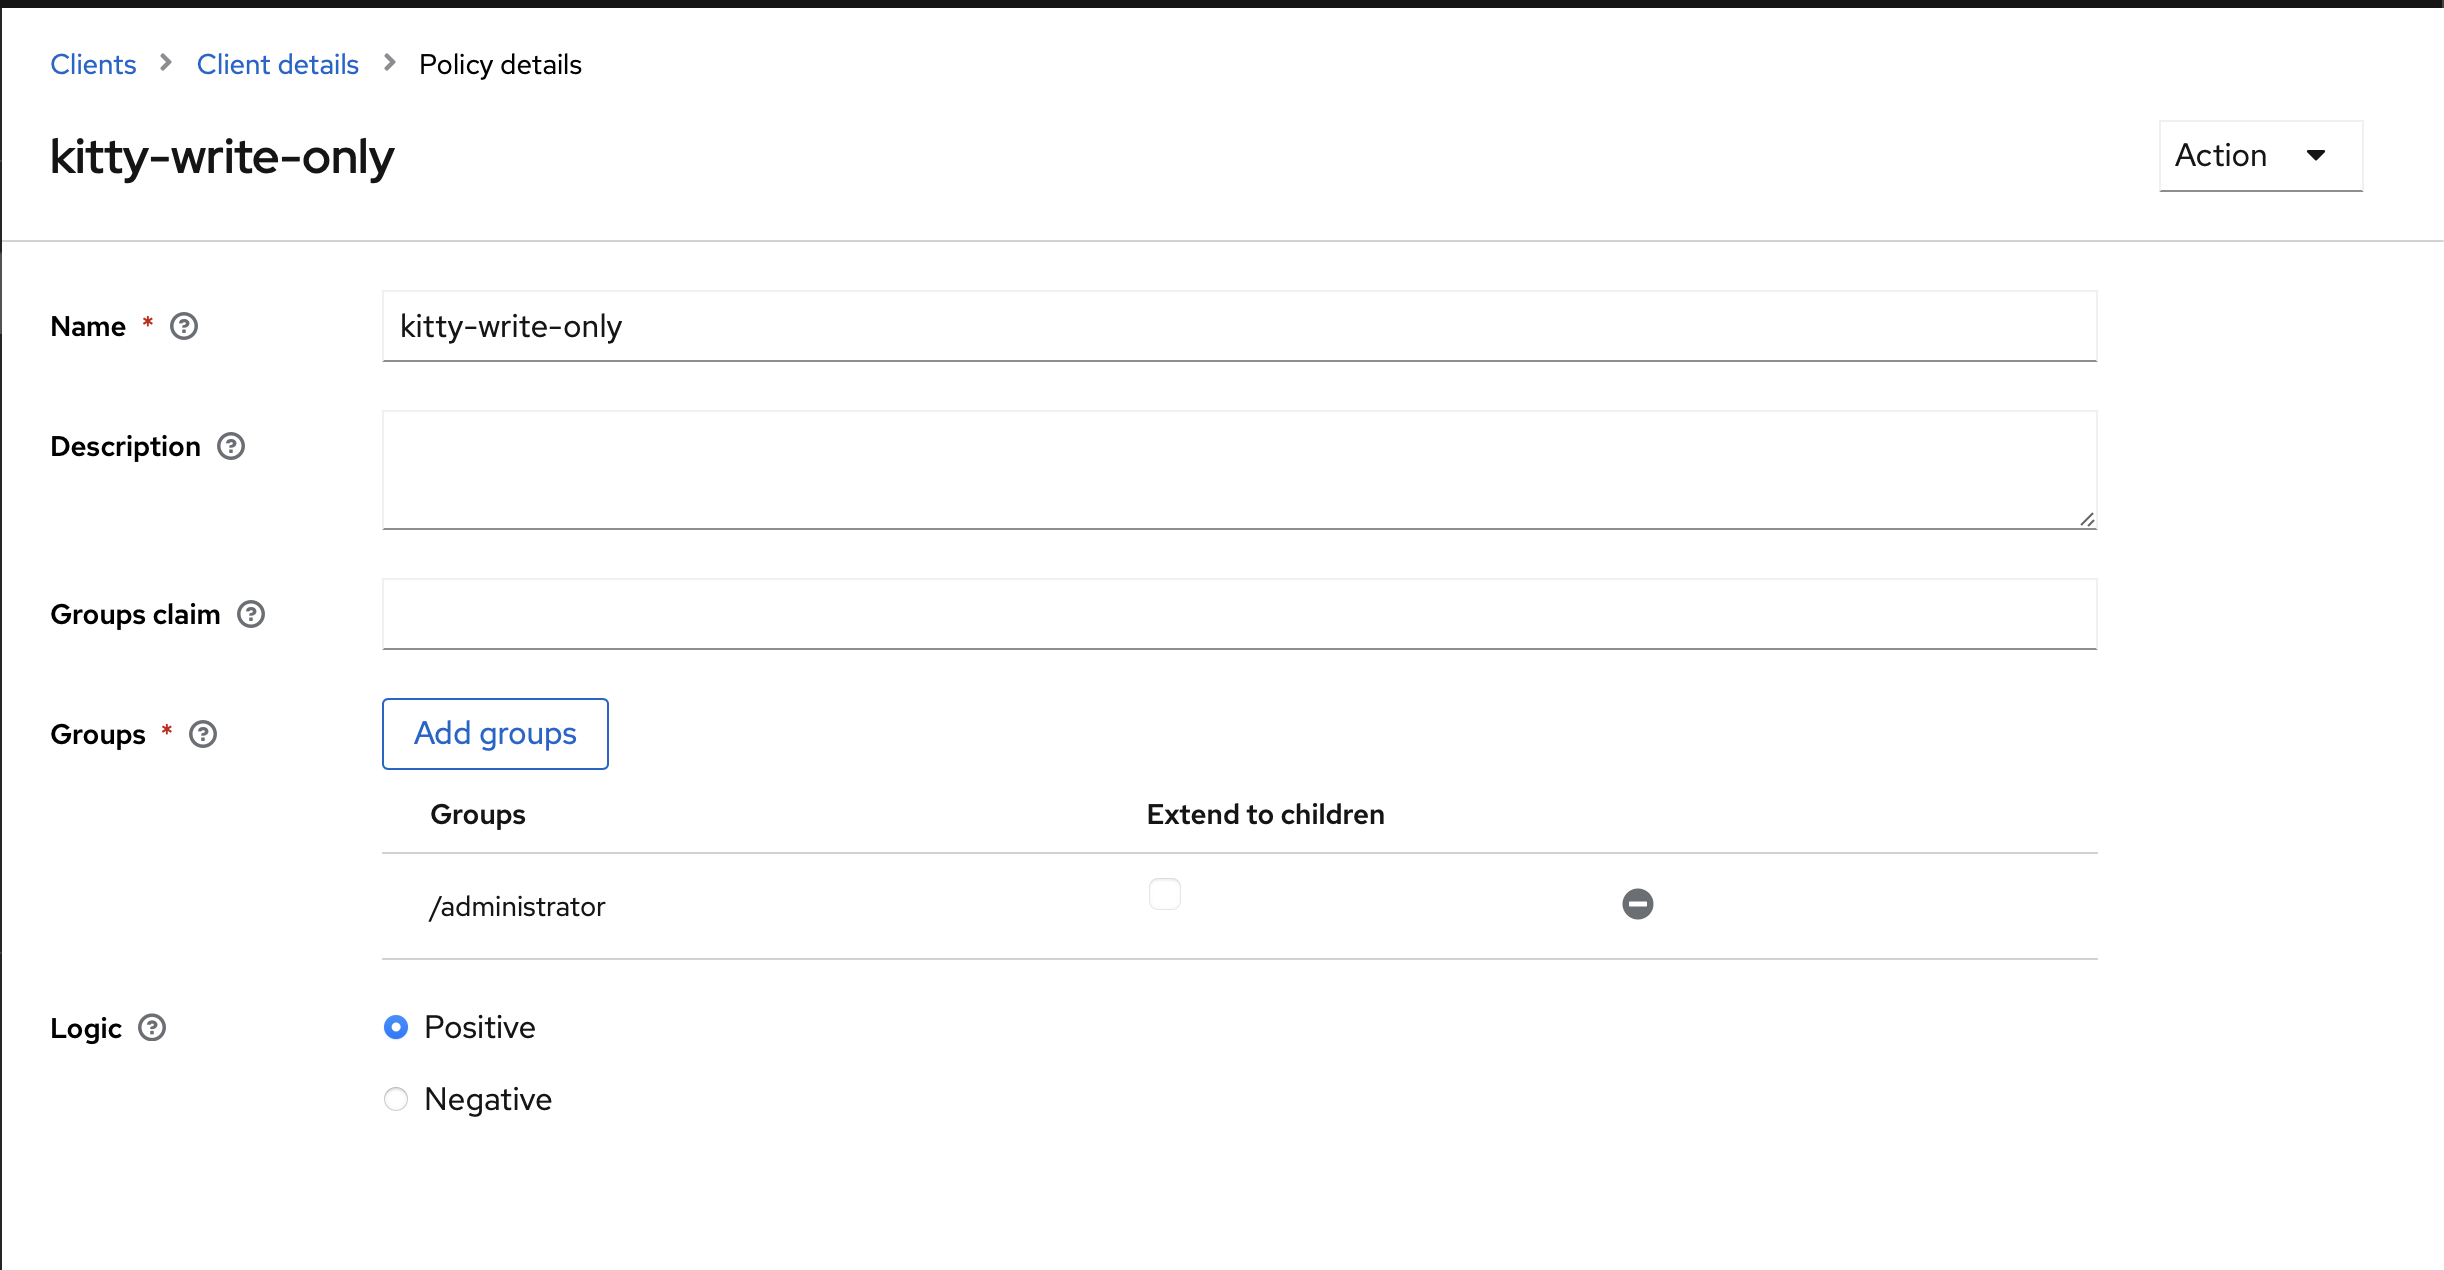
The kitty one is similar but split into two, Users can only view (GET), and Administrators can do everything.
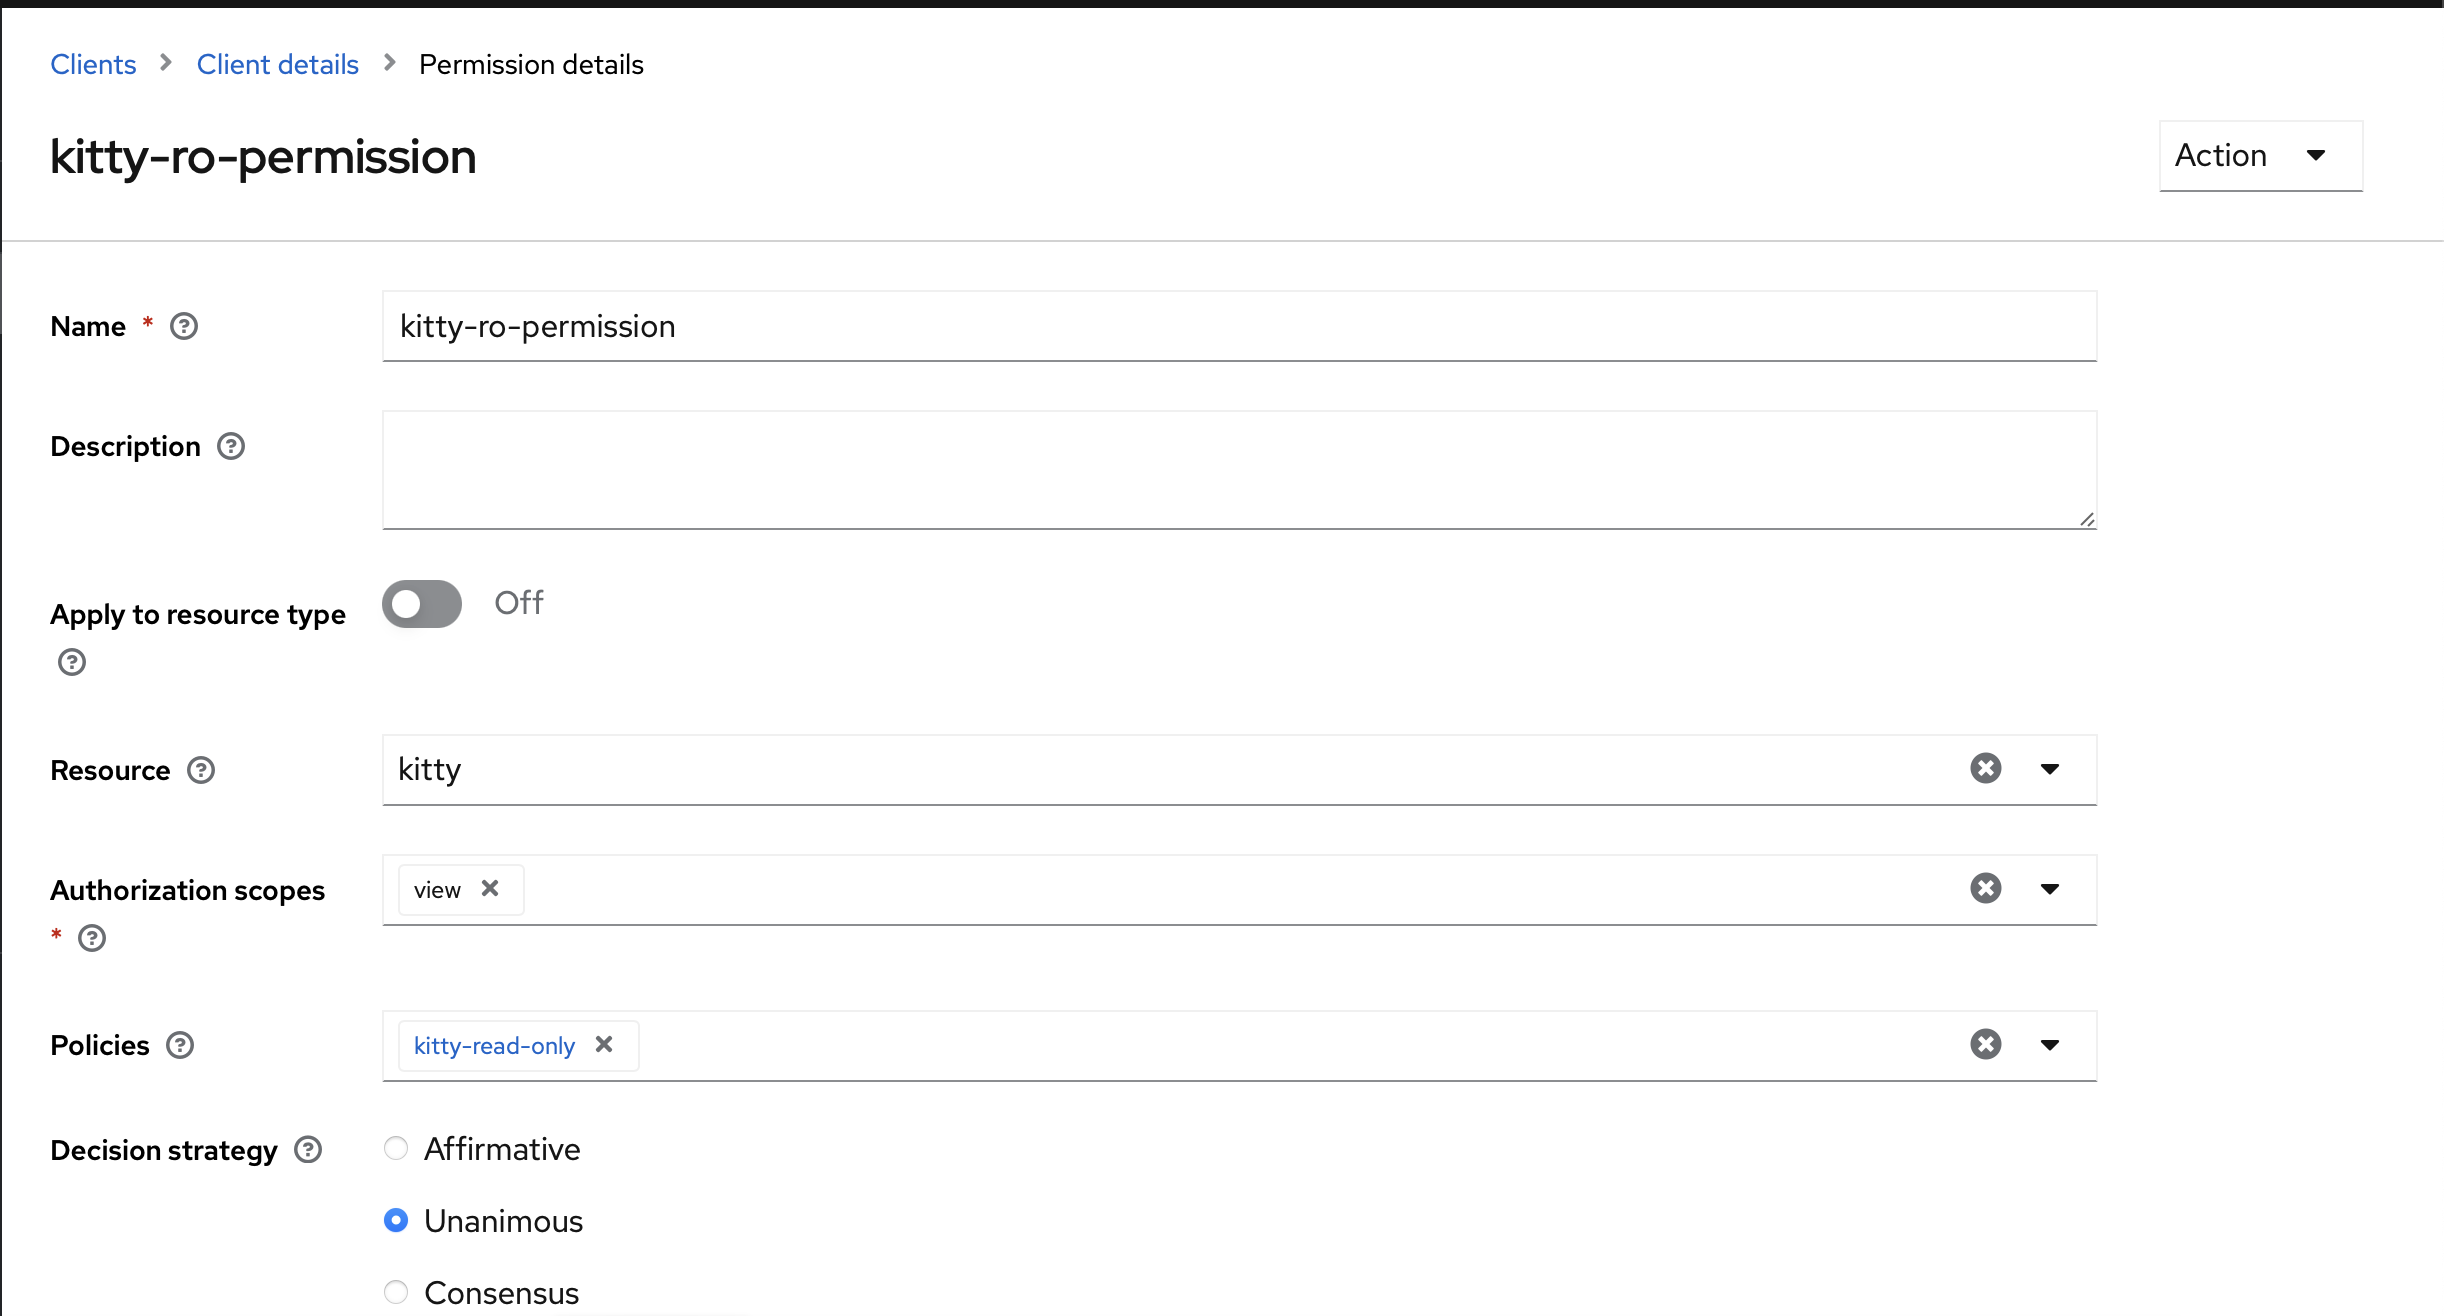
Read-only
Read-write
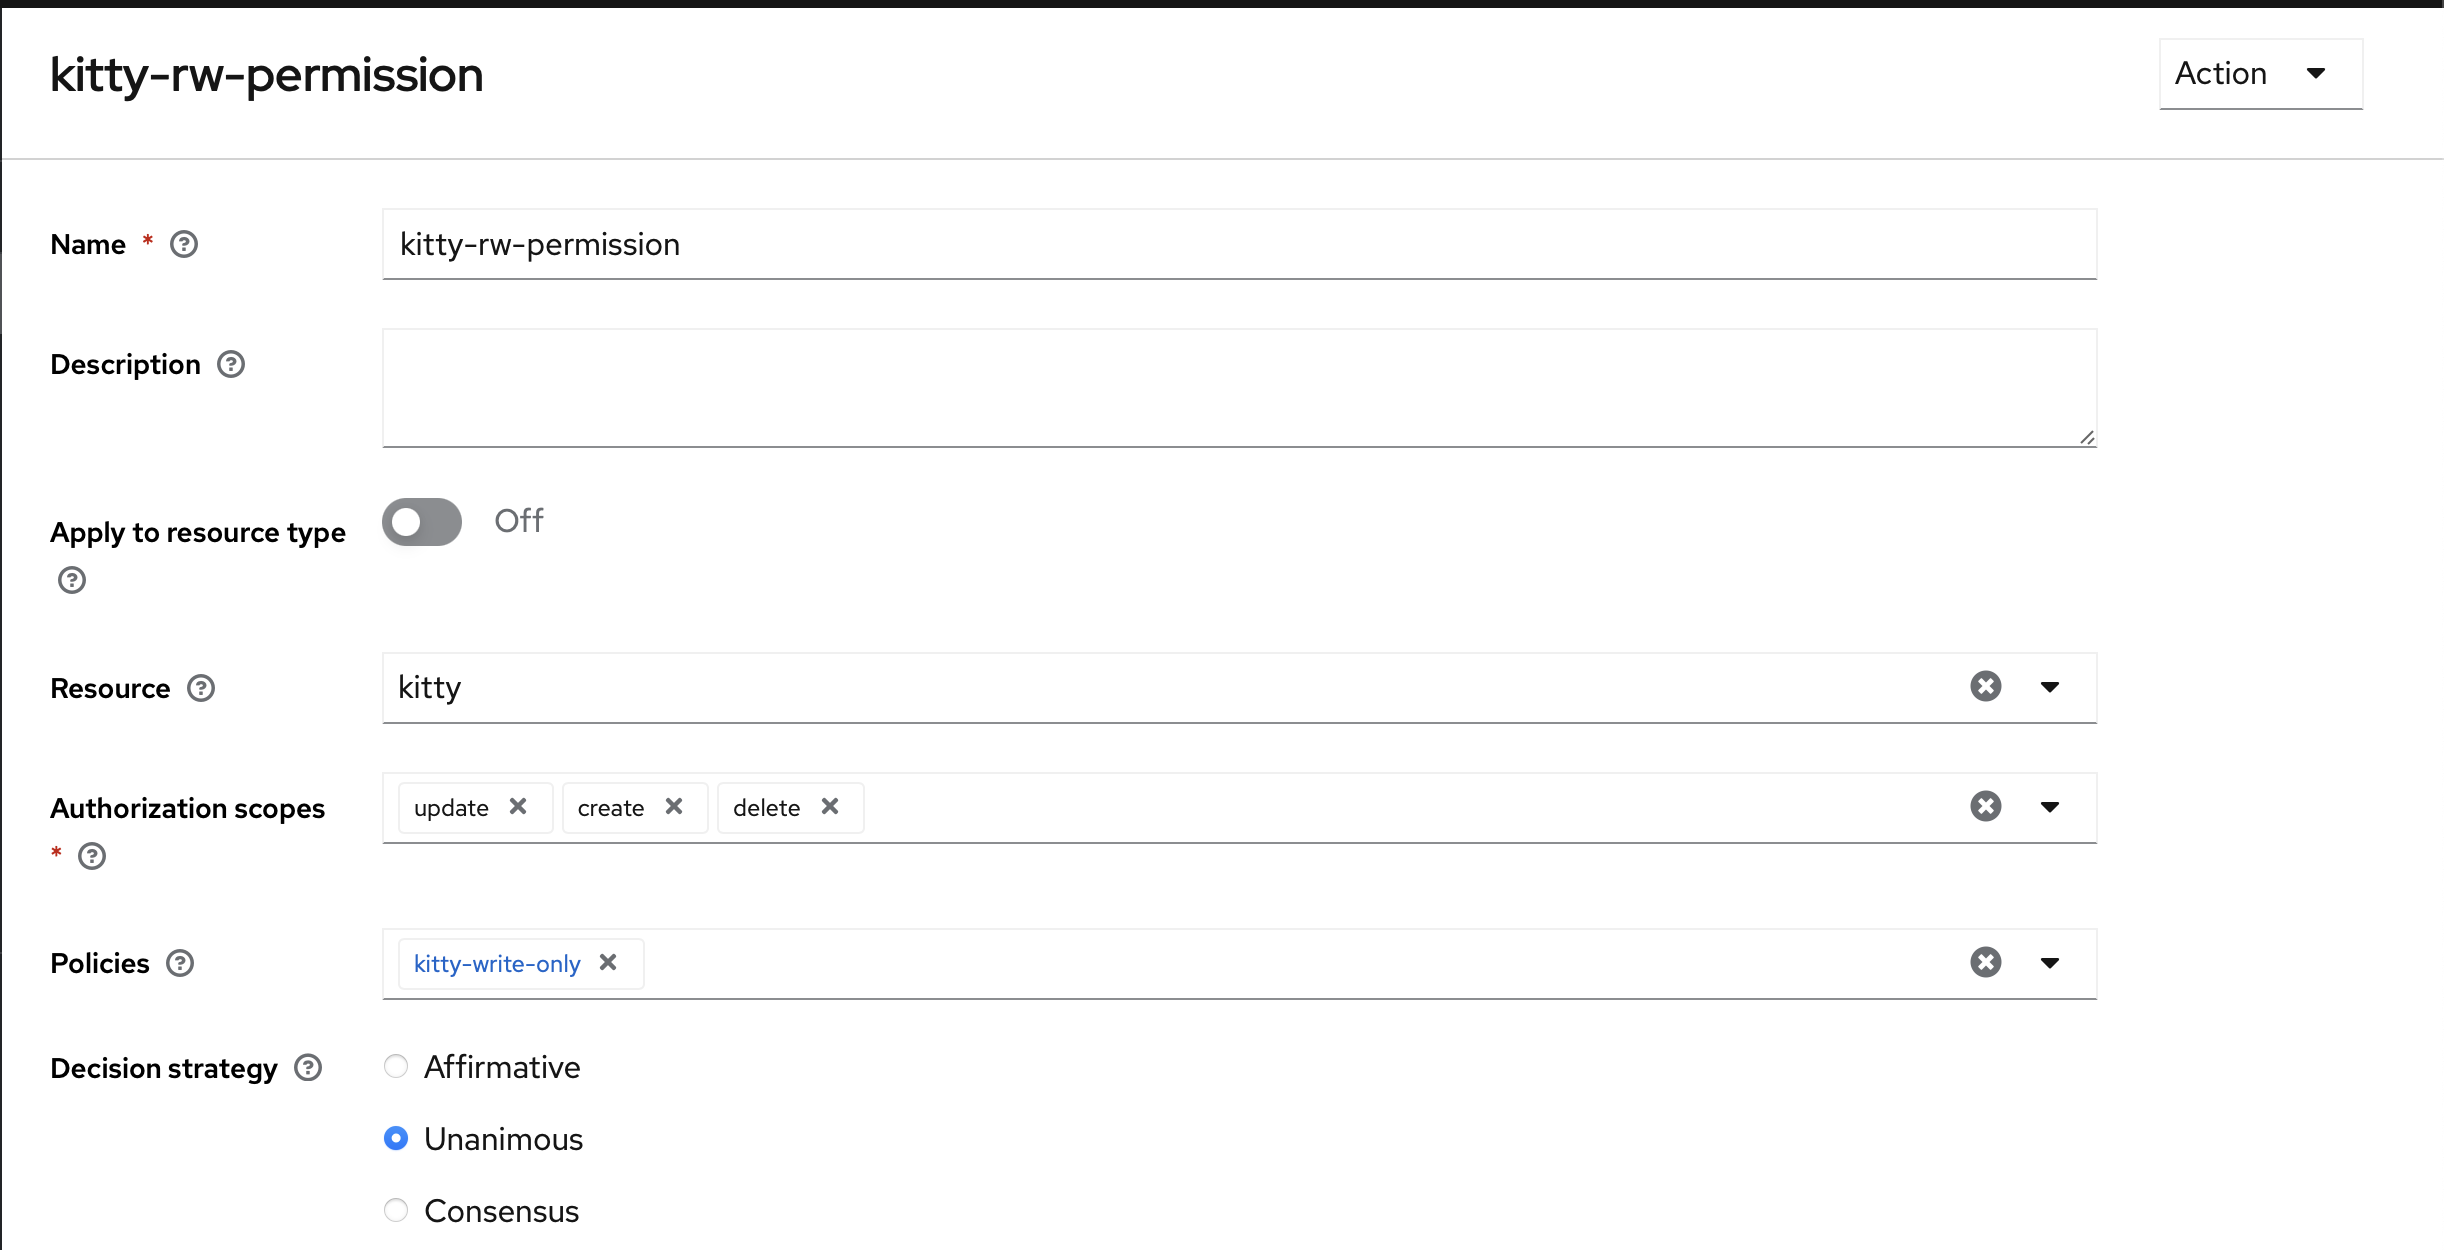
Permissions
The last step is to attach the resource, scope, and policies together.

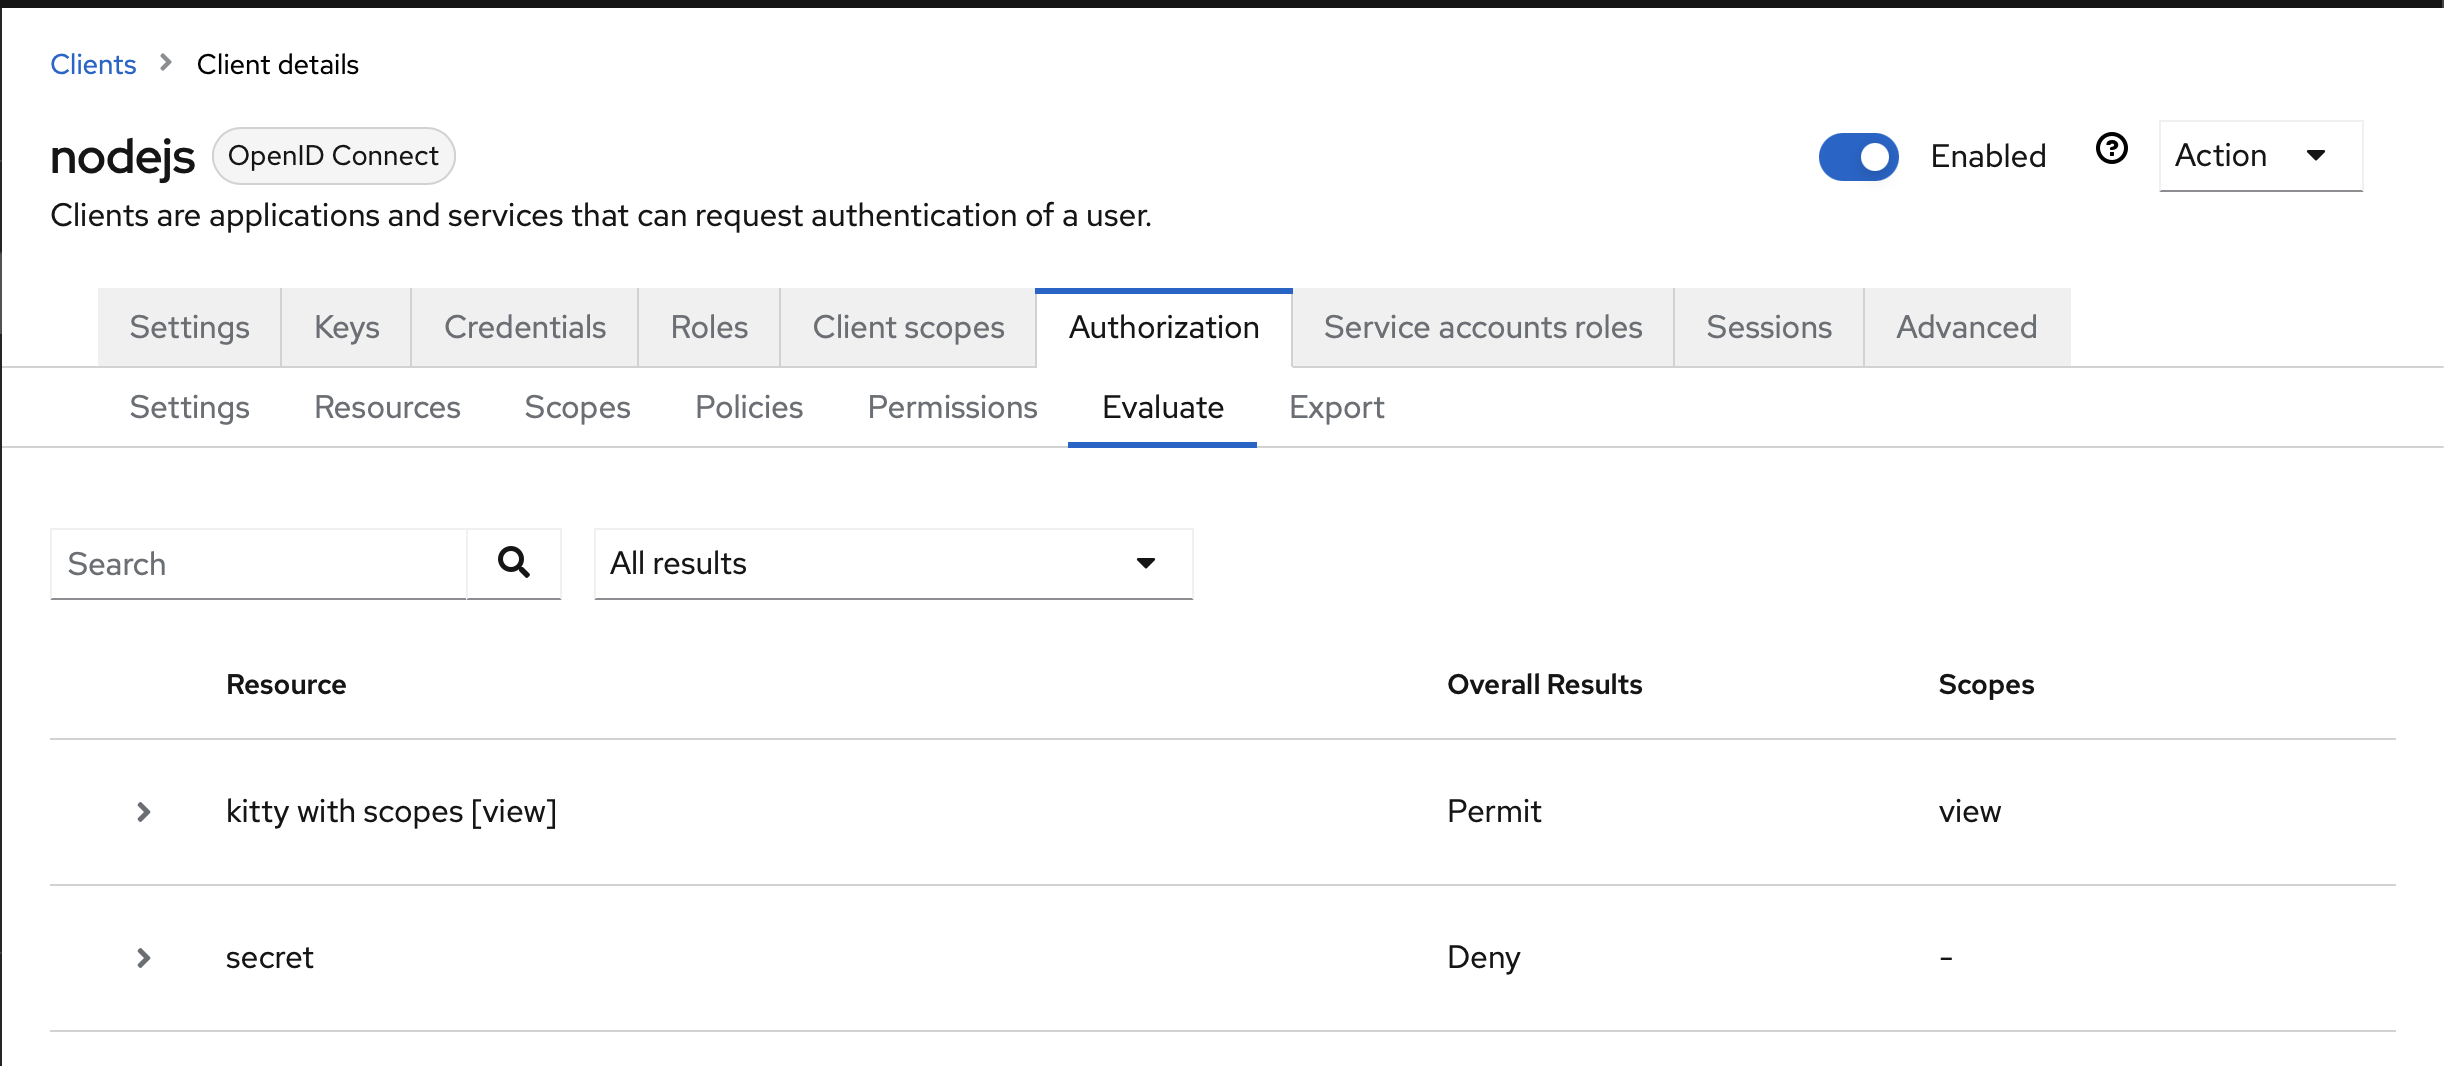
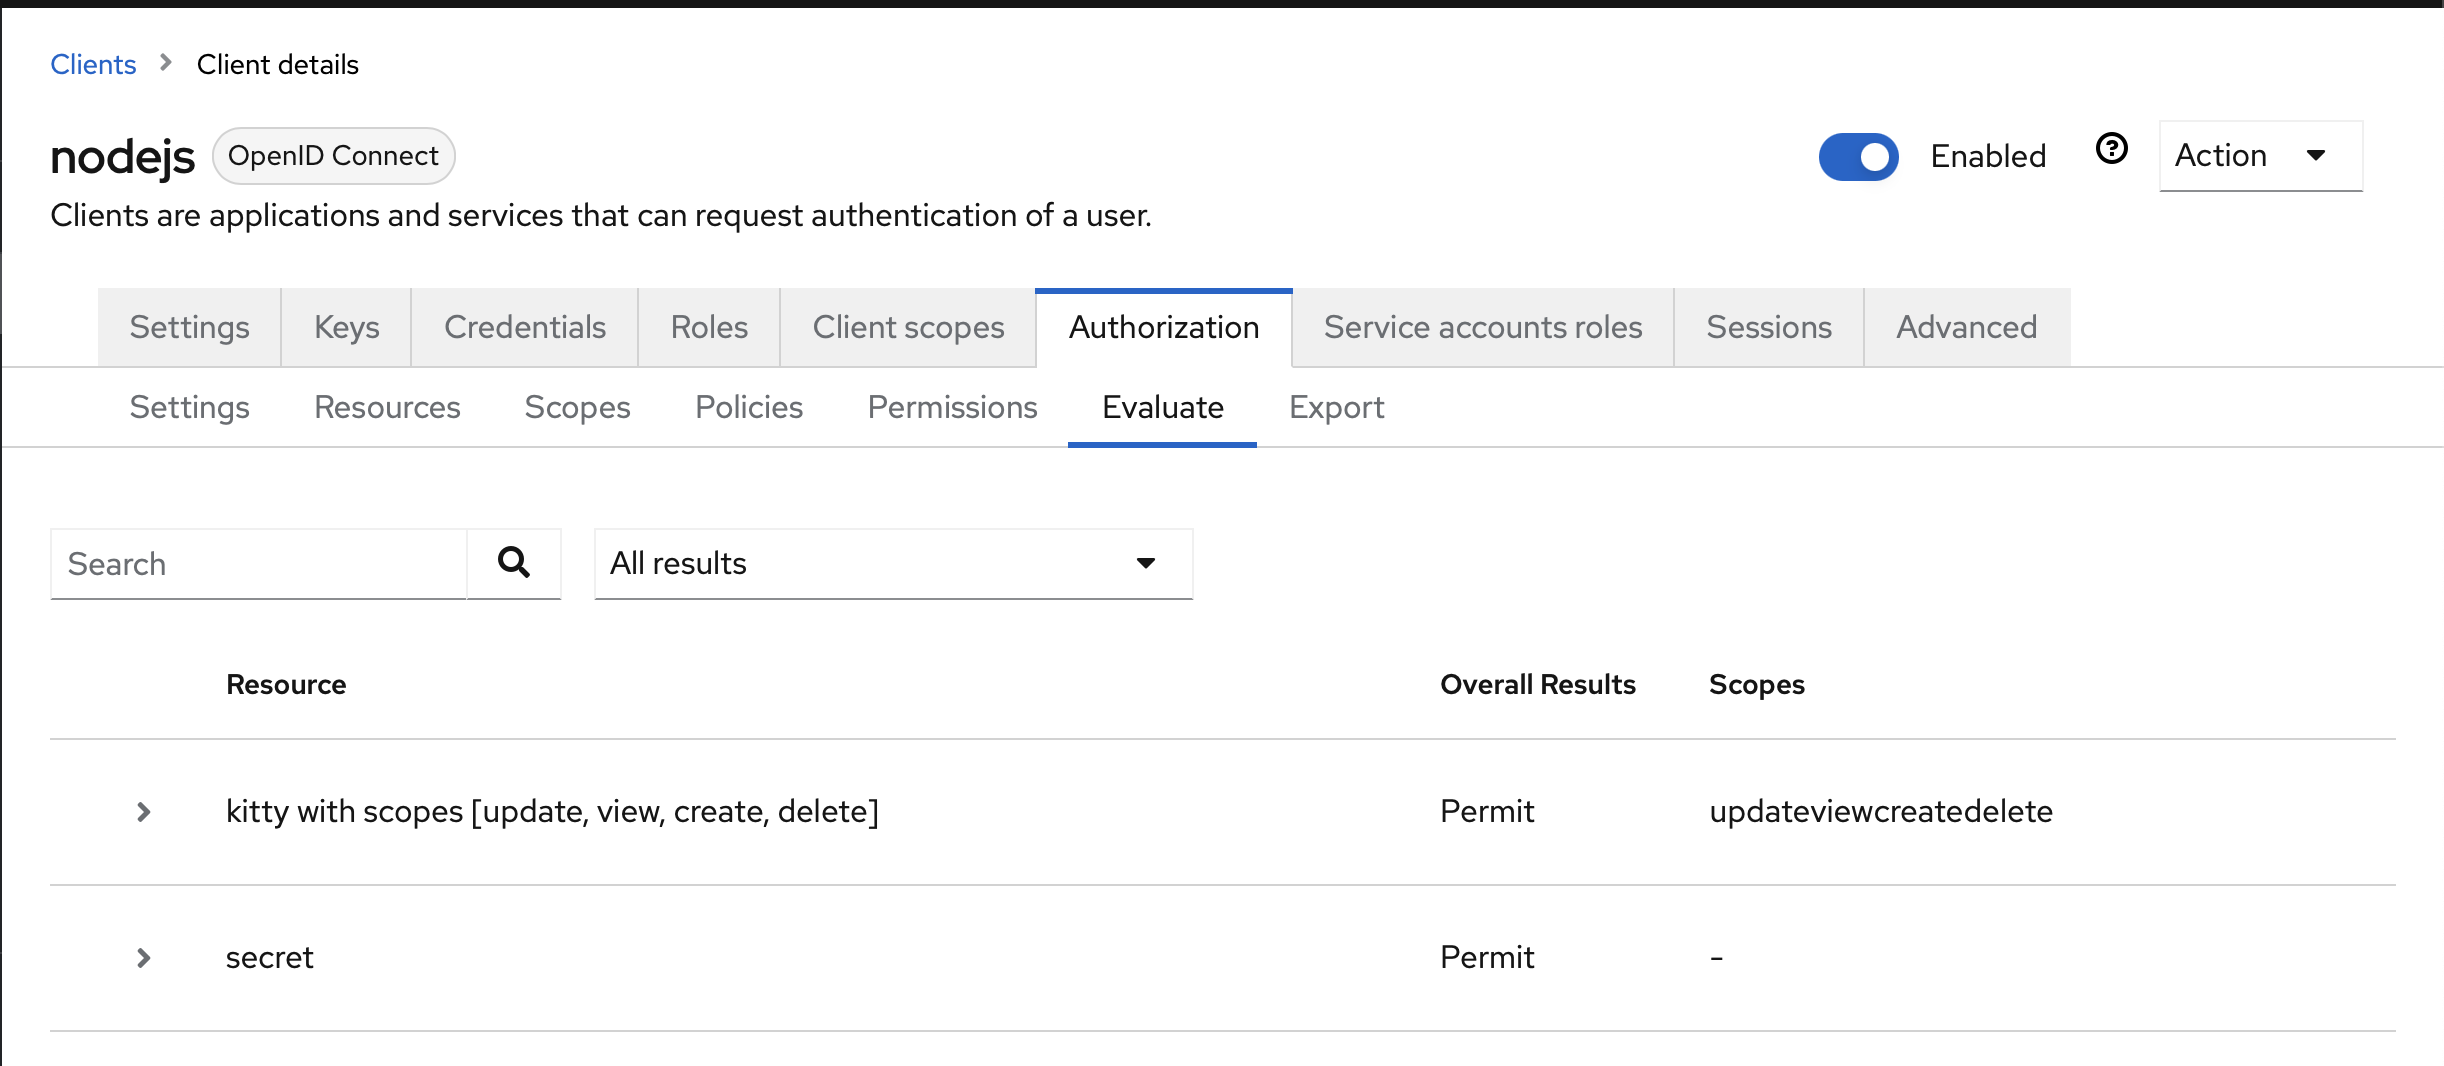
Evaluate
You can create two users, one admin, and one user. Then, in the evaluate page, you can test that your authorizations are configured as expected.
Conclusion
This is as far as I've gone with this solution. I invite you to take a look at the demo made with Node.js: Node.js Demo